Introduction
Reusable code has existed since the beginning of computing, and Android is no exception. Any library developer’s primary aim is to simplify abstract code complications and bundle the code for others to reuse in their projects.
Android libraries are one of the important parts of any android application development. We use these as per application needs like network API (Retrofit,okhttp, etc.), Image downloading and caching (Picasso, glide) and many more.
When a piece of code is repeated or can be reused-
-
- In a class: we move it to a method
- In an application: we move it to a utility class
- In multiple application: we create a library out of it
What is Android Library
The layout of an Android library is the same as that of an Android app module. Anything required to create an app, including source code, resource files, and a manifest for Android, can be included. However, an Android library gets compiled into an Android Archive (AAR) file that you can use as a dependency for an Android app module, instead of getting compiled into an APK that runs on a device.
When to create Android Library
There are specific times when you should opt for Android Library. They are-
-
- When you’re creating different apps that share common components like events, utilities, or UI templates.
- If you’re making an app that has several APK iterations, such as a free and premium version, and the main elements are the same in both.
- When you want to share your solution publicly like a funky loader, or creative views (Button, Dropdown, etc.)
- Or when you want to create and reuse or distribute some common solution that can be used in different apps like caching, image downloading, network APIs etc.
Getting Started
To learn how to publish an Android library, we need to briefly talk about the creation of the Android Library. We will also check its usage in a basic app flow, and to understand how to publish our library.
Creating the Android Library
-
-
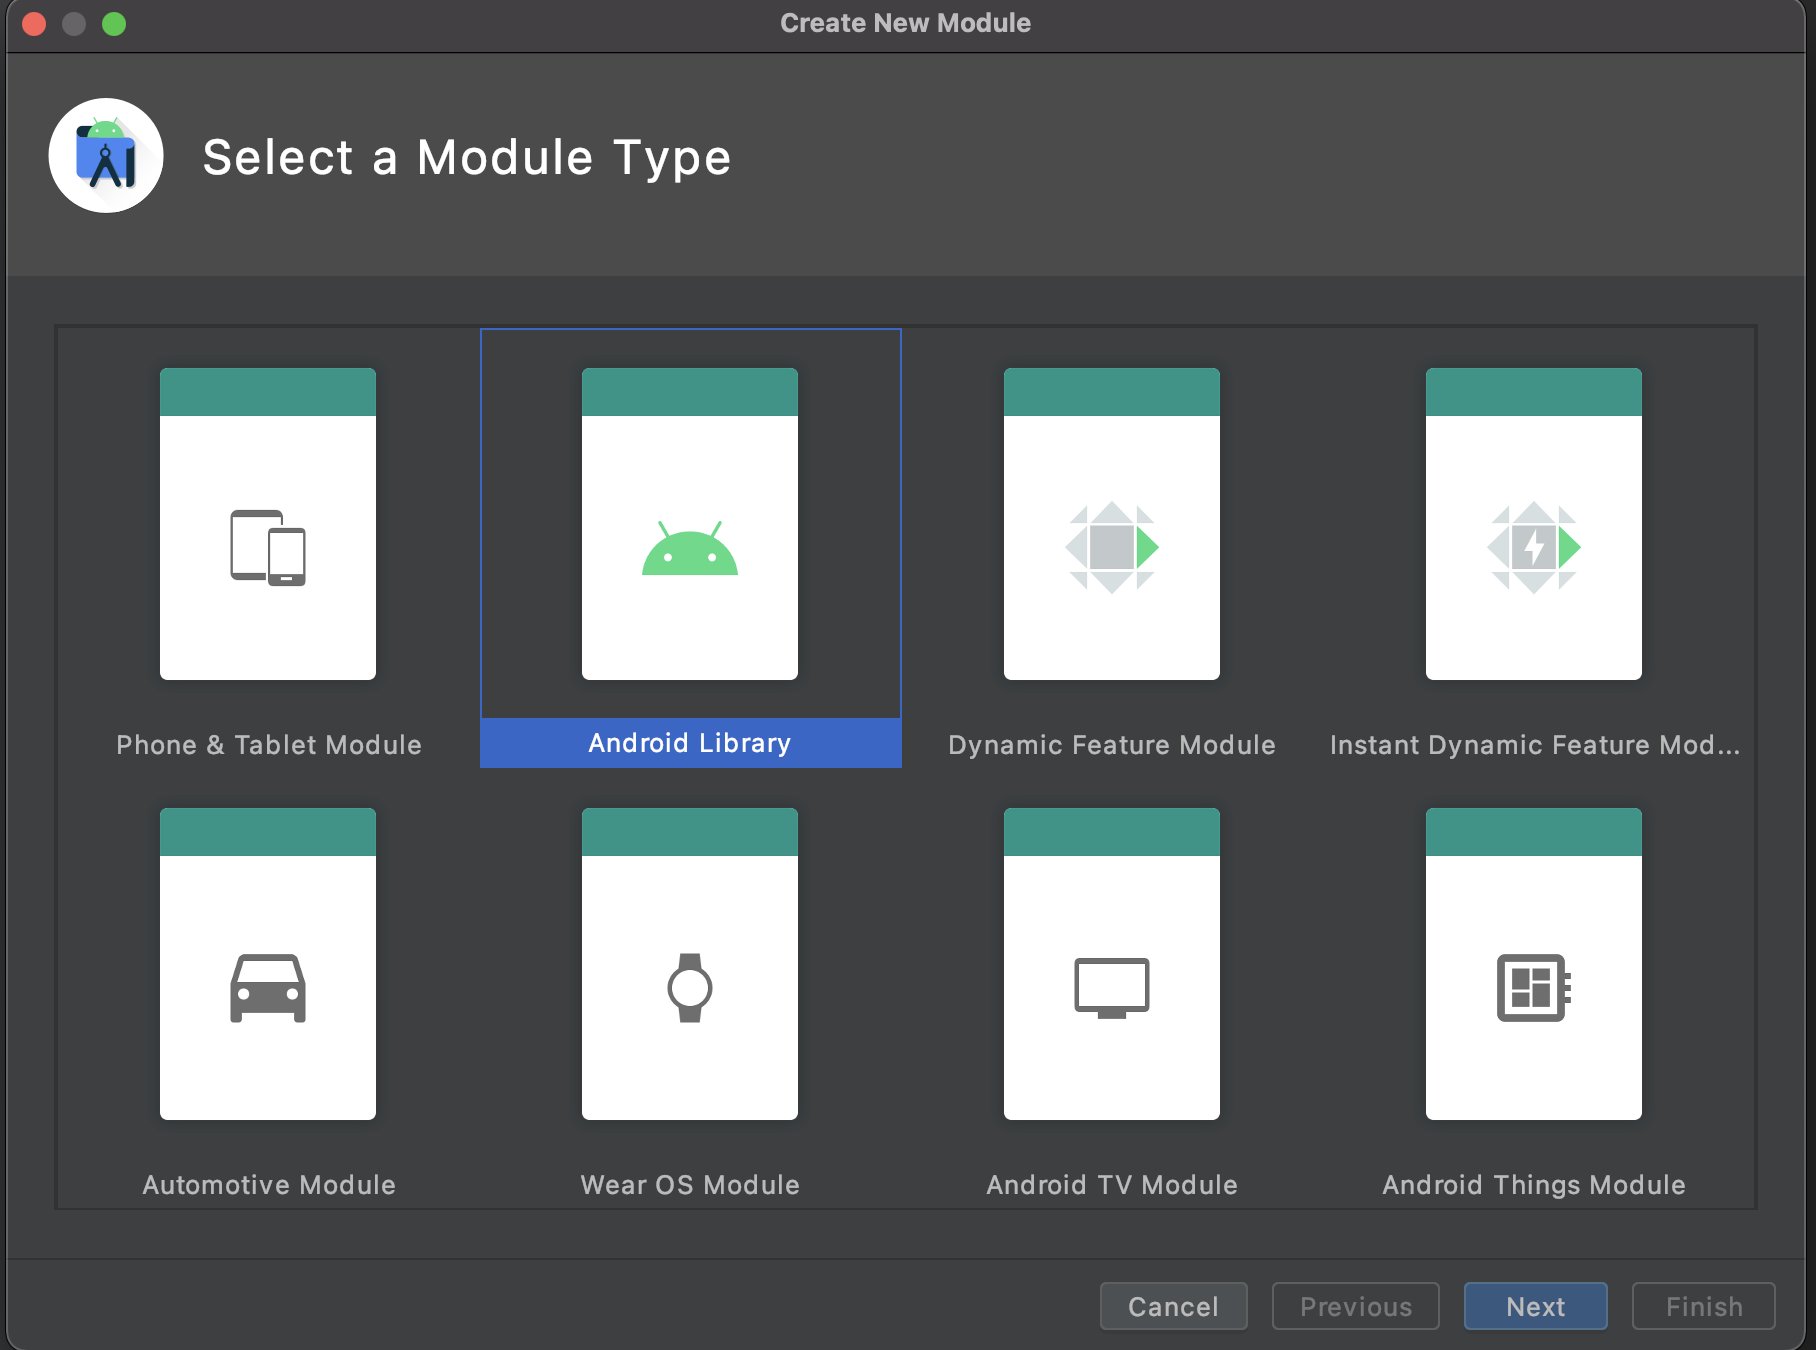
Create a new library module.
-

-
- Select Android Library and click Next.
-
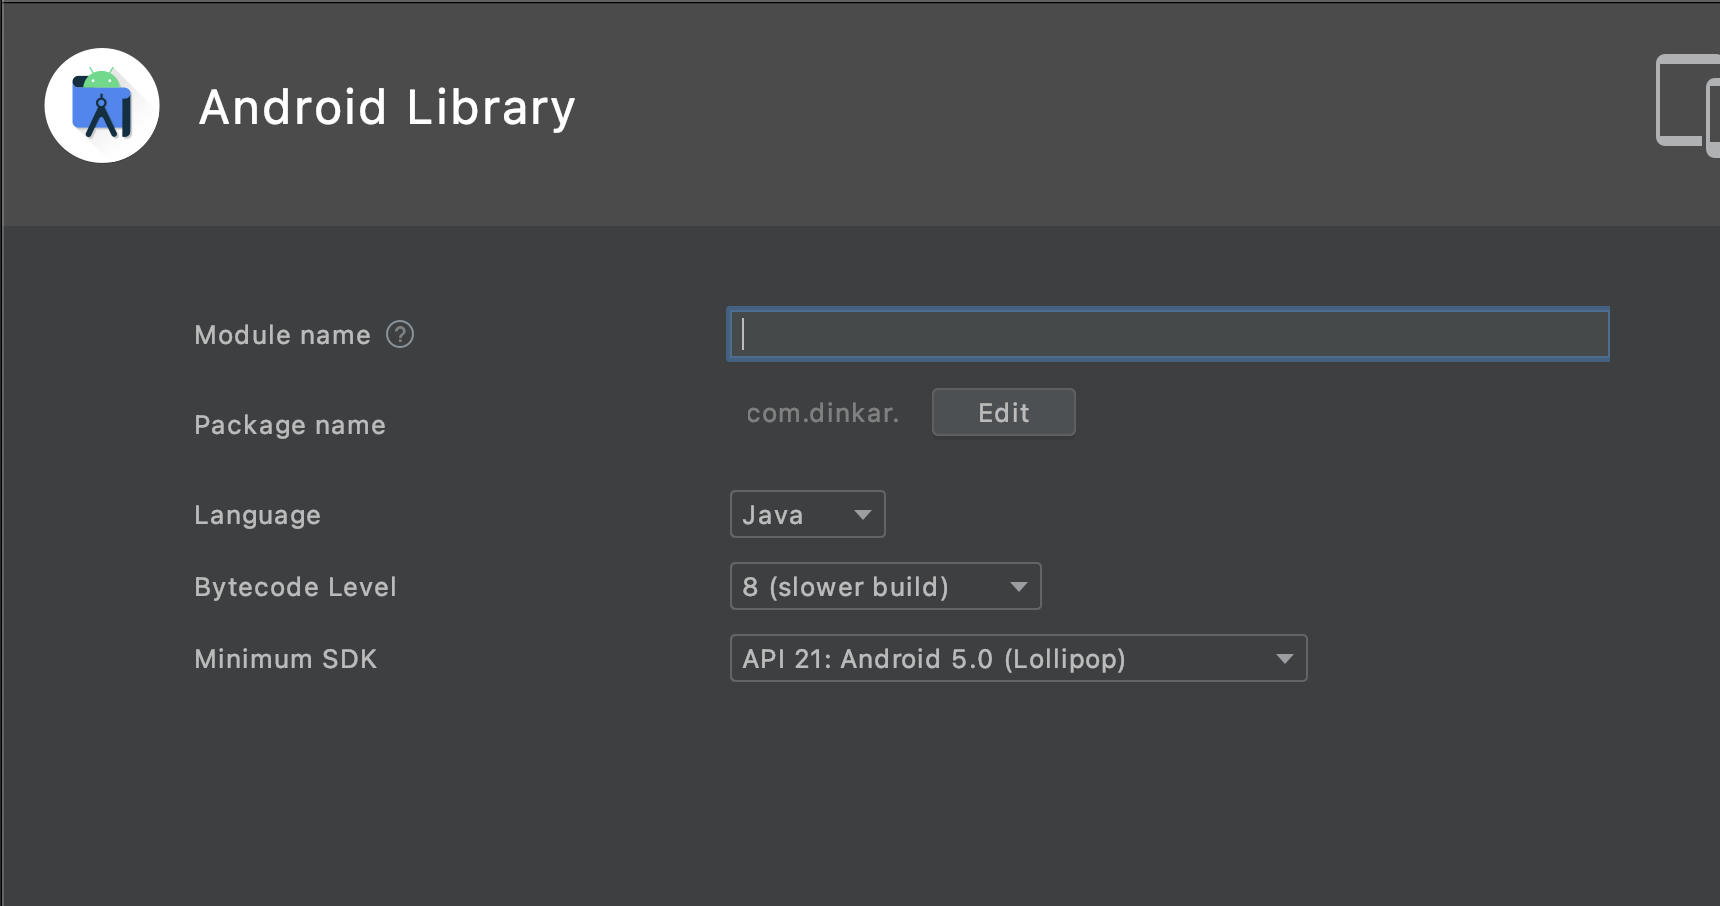
- Enter the module name.
-
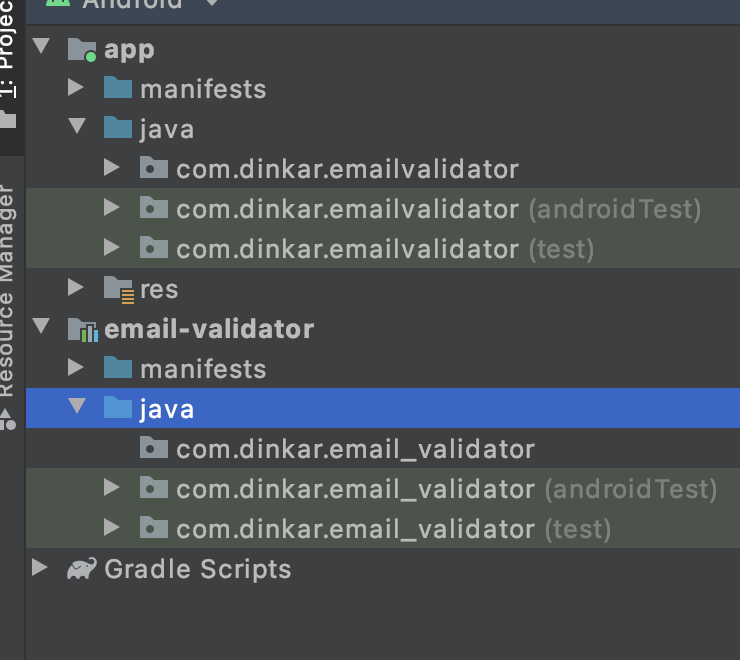
- The project structure be looking something like below-
-
- Let’s create an email validation class in our library.
Our email validation library is ready. Let’s test this library by integrating it into our sample app.
Adding Library in Our App
Add the following in dependencies of build.gradle of the app module and sync project
implementation project(‘:email-validator’)
Now EmailValidate class of the library is accessible in our app and we can use the validation API of the library to check email validation.
We successfully used the library in our sample application, now the next step will be to publish it for others to be able to use it.
What is Jitpack?
JitPack is a unique package repository for Java Virtual Machine and Android projects. It builds Git projects on demand and offers ready-to-use artifacts (jar, aar).
If you want your library to be available to the world, there is no need to go through project build and upload steps. All you need to do is push your project to GitHub and JitPack will take care of the rest. That’s it!
Why Jitpack?
There are reasons that give Jitpack an edge over others. They are-
-
- It builds a specific commit or the latest one and works on any branch or pulls request
- Library javadocs are published and hosted automatically
- You can track your downloads.Weekly and monthly stats are also available for maintainers.
- Artifacts are served via a global CDN, which allows fast downloads for you and your users
- Private builds remain private. You can share them when needed.
- Custom domains: Match artifact names with your domain
- Jitpack works with Github,GitLab, BitBucket
Publishing Library
We need to bring our Android project into a public repo on our GitHub account first to continue publishing the library for this tutorial. Build a public repo and push all the files to the repo in our GitHub account.
We can only use this library right now since the library module is only accessible for our project. We’ll have to publish the library on JitPack to make the email-validator library accessible to everyone.
Building for JitPack
-
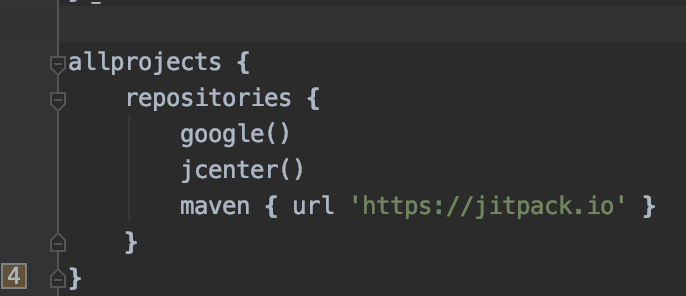
- Add the JitPack maven repository to the list of repositories in the root-level build.gradle
-
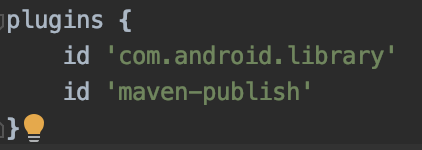
- Enable maven to publish plugin by adding the following in build.gradle of the library module
-
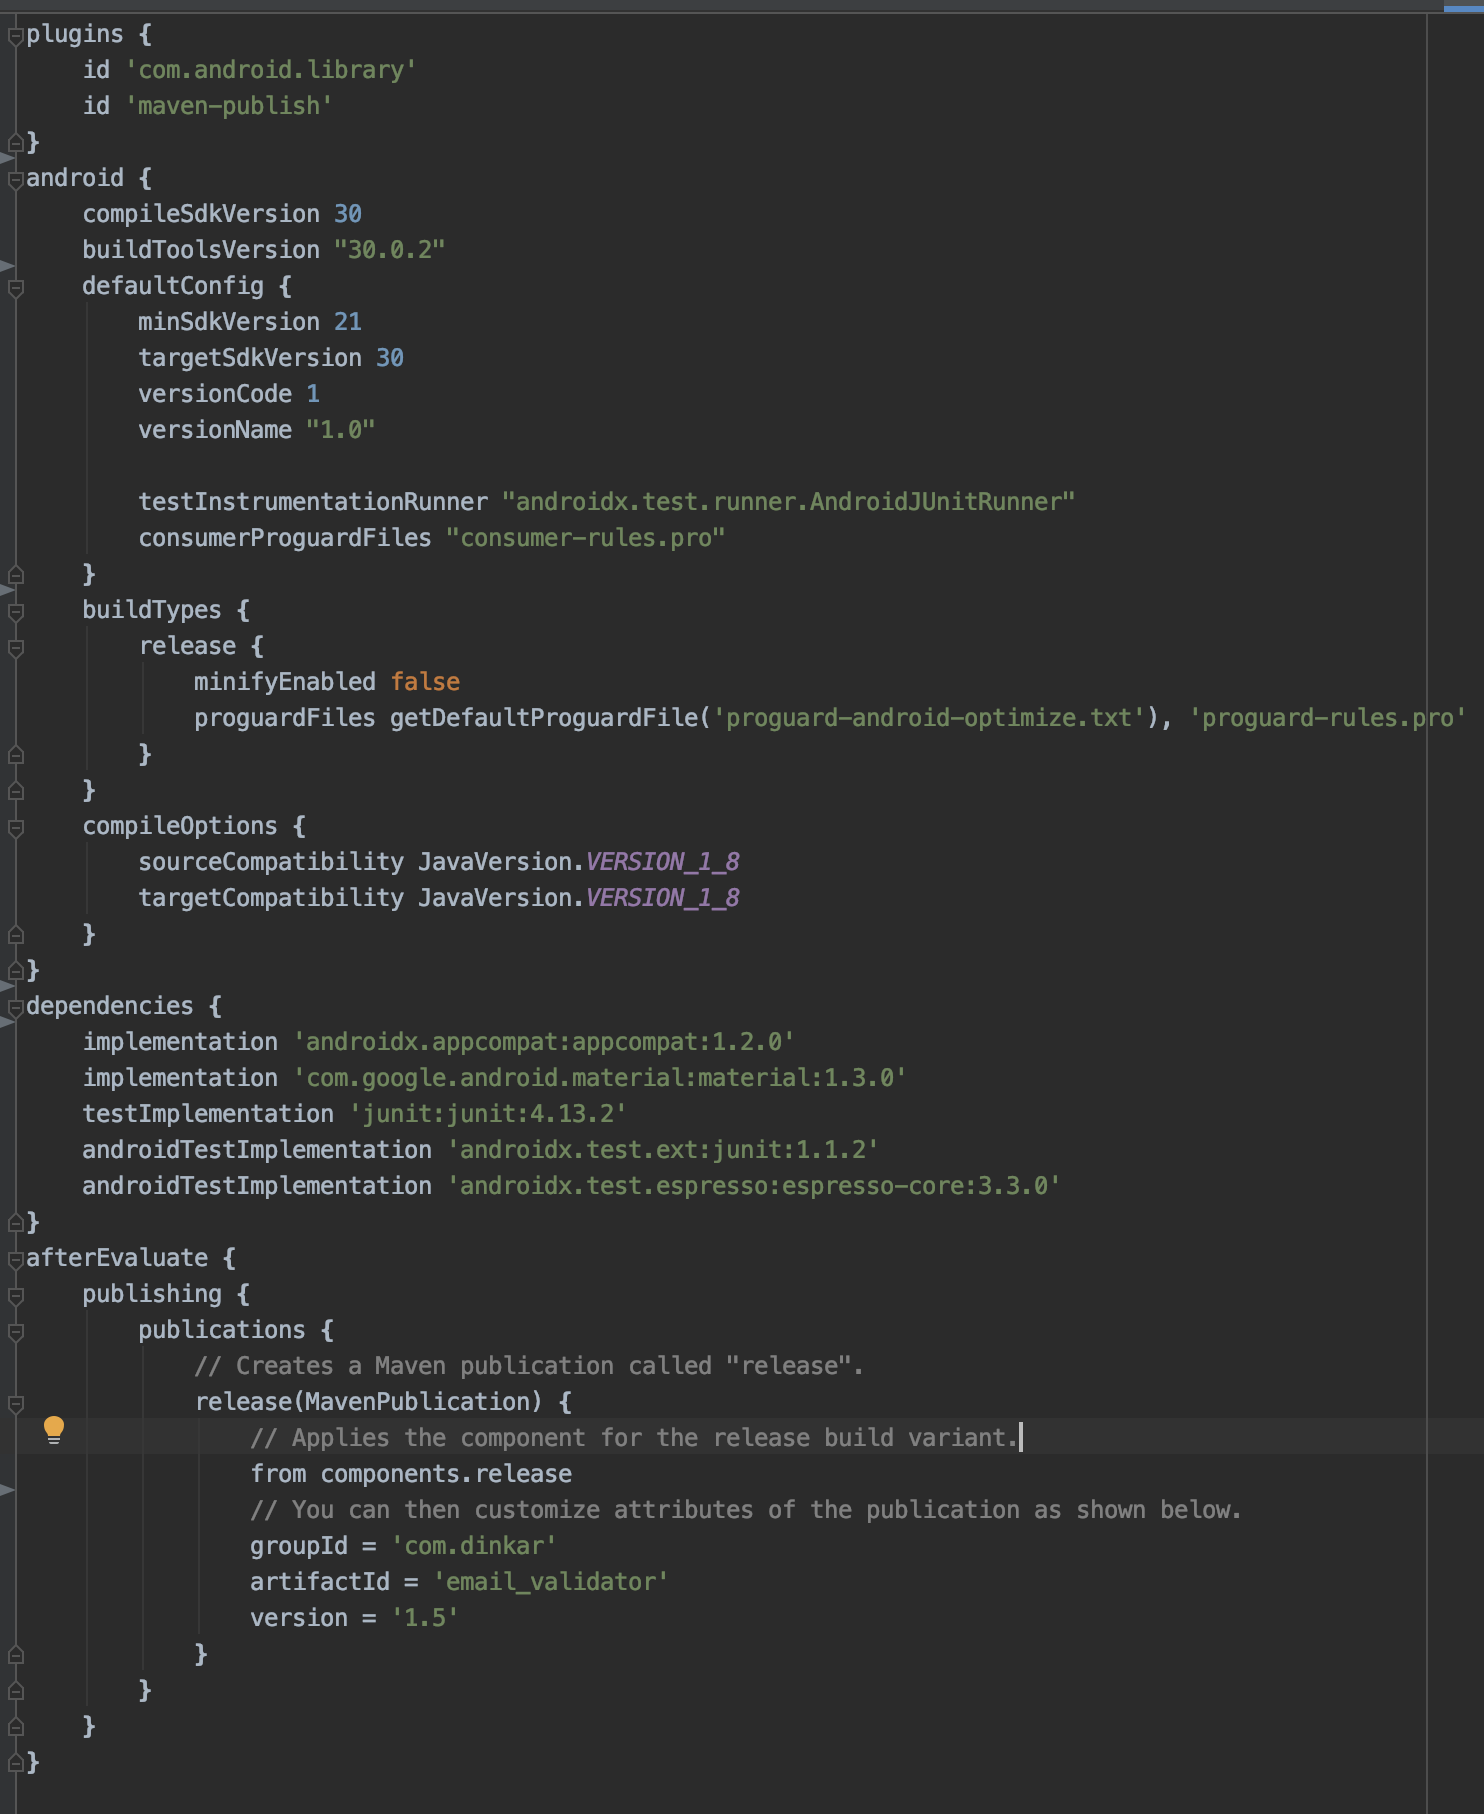
- The code sample below produces a publication for an AAR library’s release. add it to the root level of the build.gradle of the library module.
- The code sample below produces a publication for an AAR library’s release. add it to the root level of the build.gradle of the library module.
Check Maven Publish Plugin
Let’s check whether all the changes we have done are correctly configured in the maven publish plugin or not. Check that your library can be installed to mavenLocal ($HOME/.m2/repository):
-
- Run following command in Android Studio Terminal
./gradlew publishReleasePublicationToMavenLocal
- Run following command in Android Studio Terminal

-
- Let’s see the $HOME/.m2/repository directory

Publish Library on JitPack
-
- Commit the changes we have done in the library module
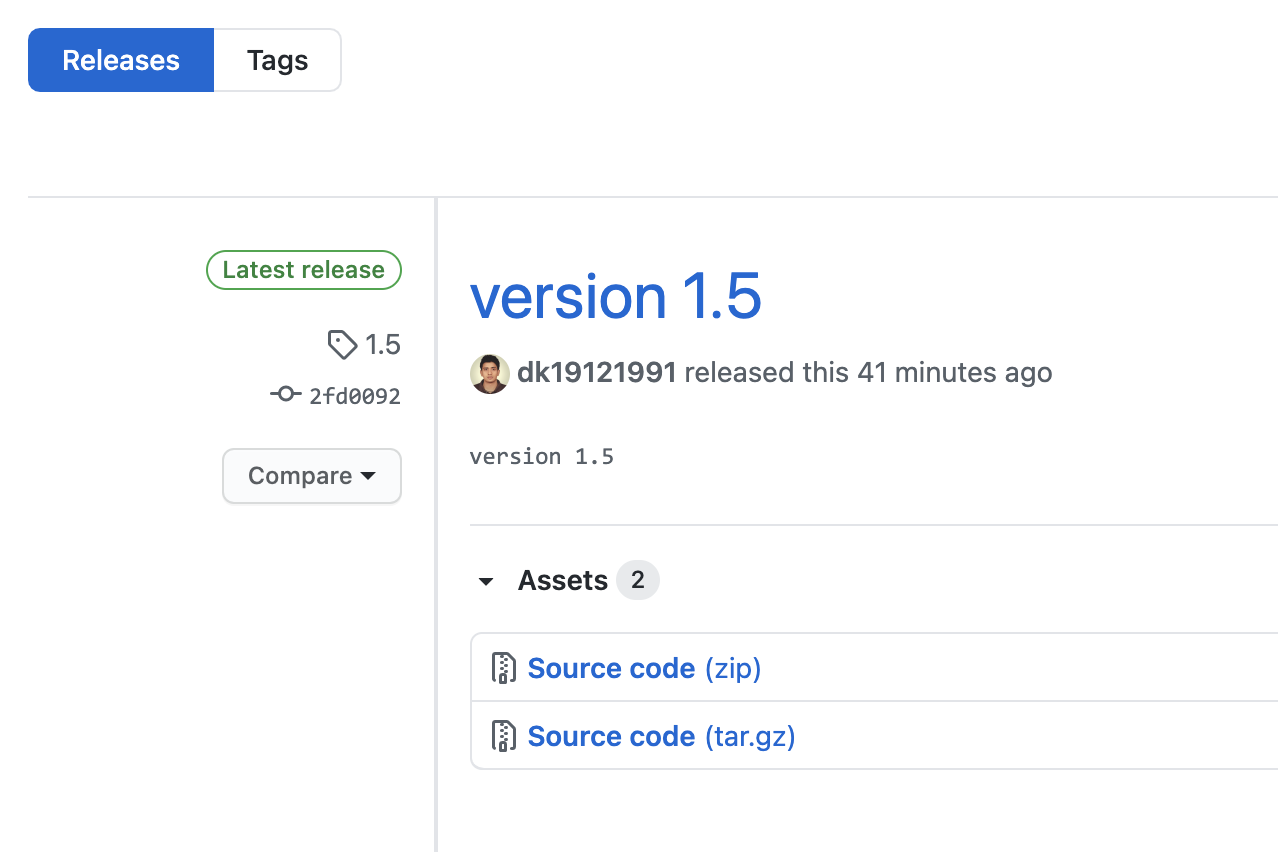
- If everything goes well in the previous step, your library is ready to be released! Create a GitHub release or add a git tag and you’re done!
- Create a release tag in the GitHub repo
-
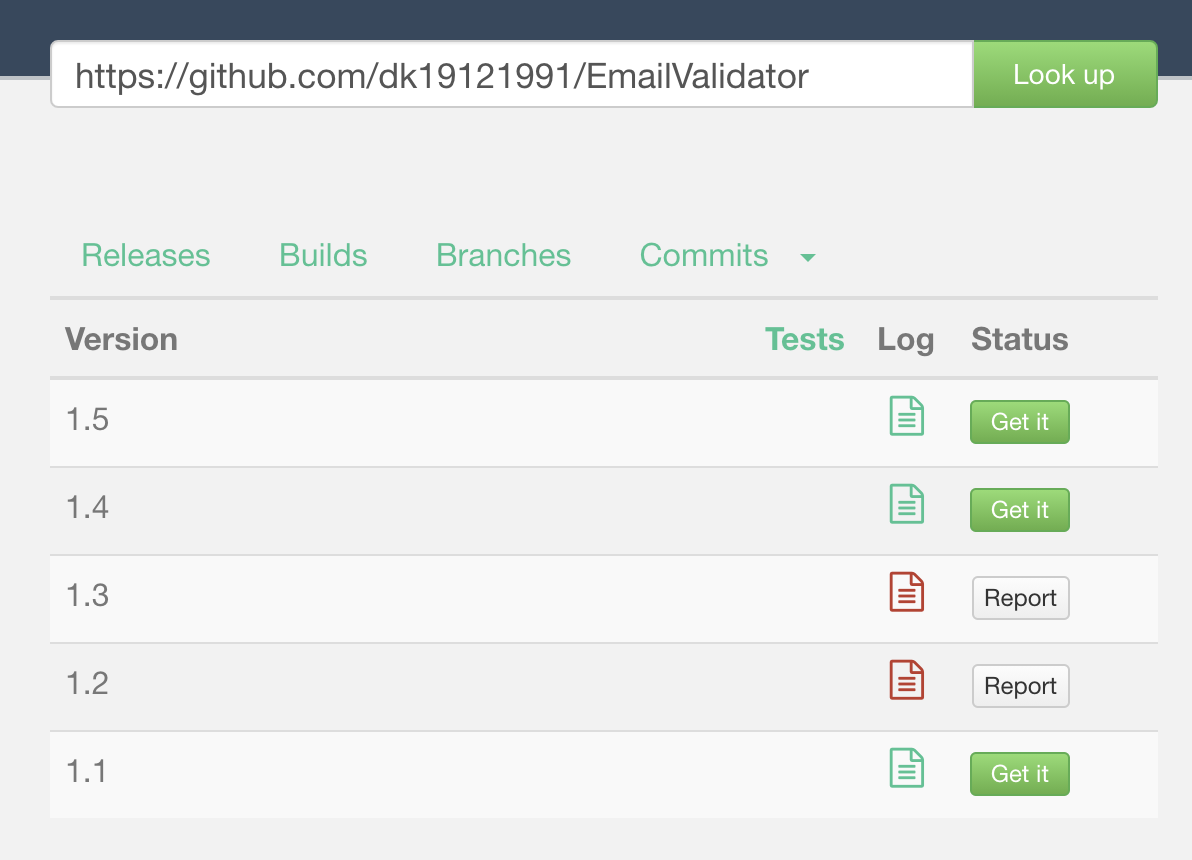
- Open https://jitpack.io/ and lookup for your repo
-
- If there is any error you can see in the “Log” tab with detail like what went wrong. For instance, I can check what went wrong for version 1.3

It says the build was successful but when it tried to upload the artifacts it was nowhere to be And the reason was, in 1.3, I forgot to commit the maven to publish settings in my build.gradle of the library module.
Installing Library
-
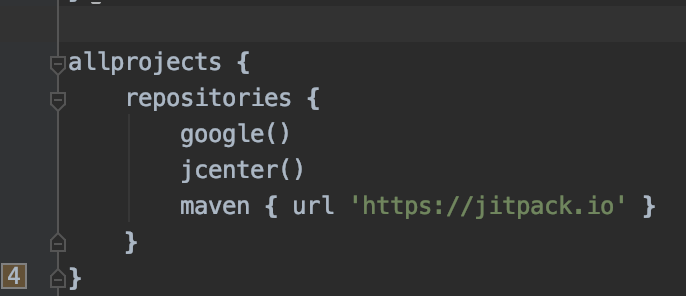
- For installing the library in any app, we have to add the following in the project build.gradle
maven { url 'https://jitpack.io' }
- For installing the library in any app, we have to add the following in the project build.gradle
-
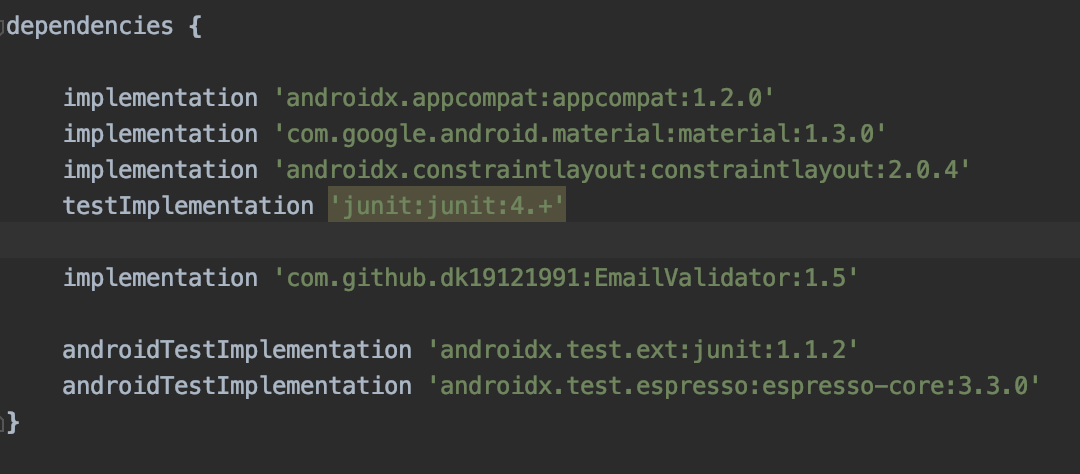
- Add library dependency in the app module build.gradle
implementation 'com.github.dk19121991:EmailValidator:1.5'
- Add library dependency in the app module build.gradle
-
- Sync the project and Voila! we can use our library downloaded publicly in the app
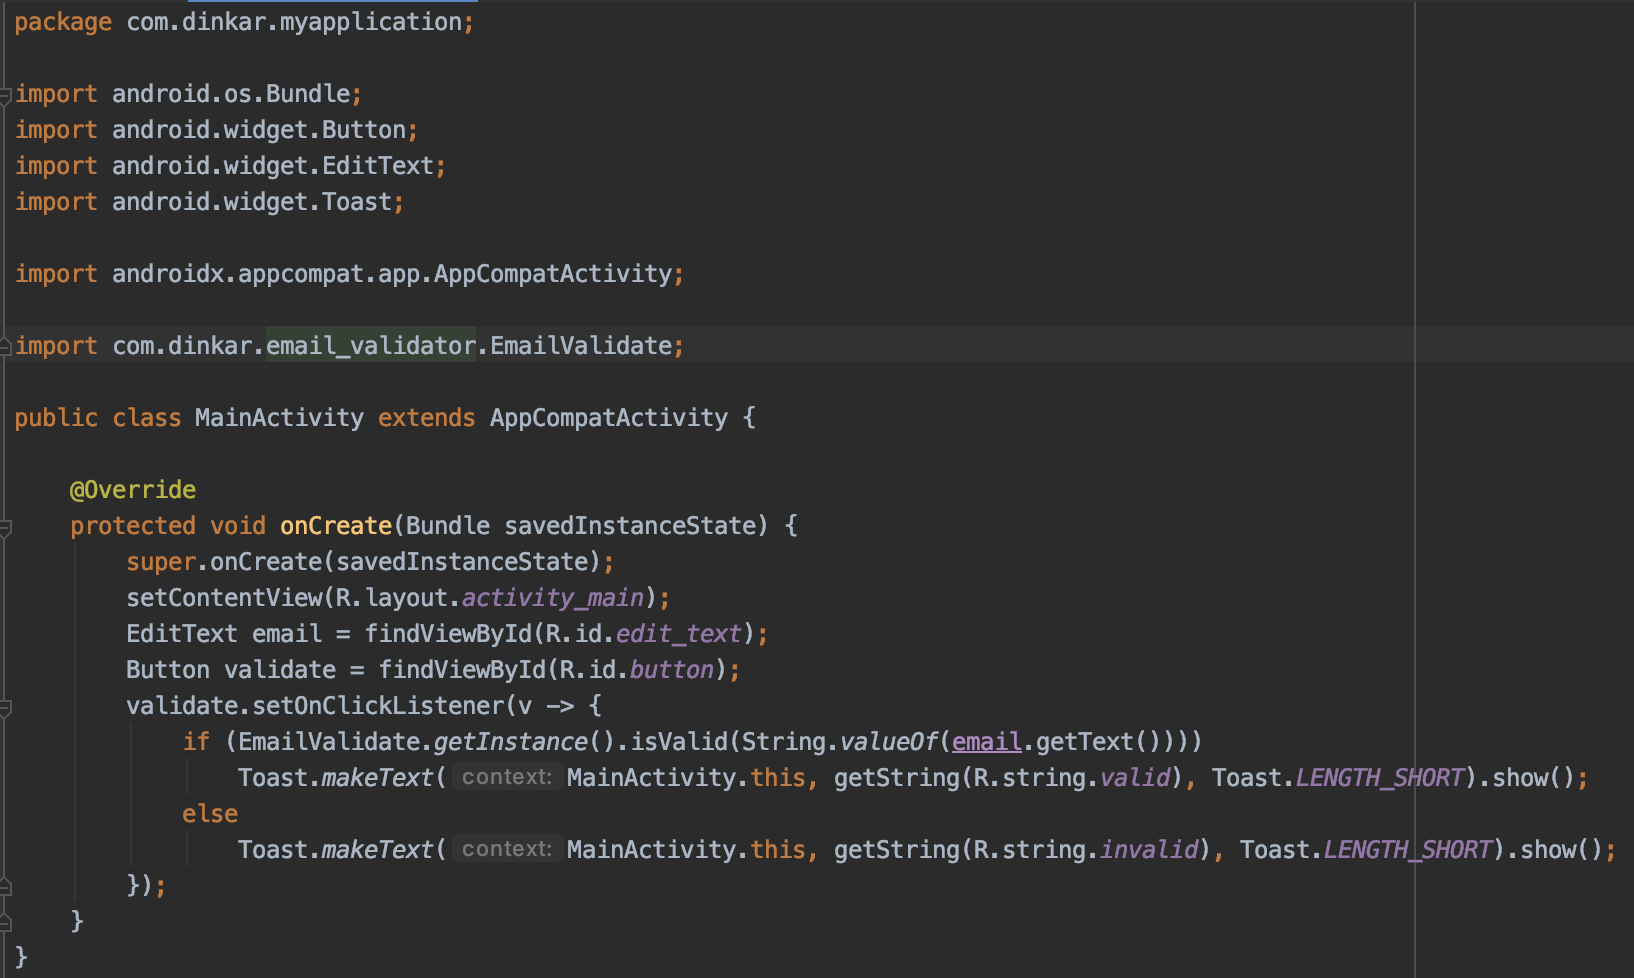
Congratulations! You can now publish your library for public usage.
For more details and an in-depth view, you can find the code here
References: https://jitpack.io/ , https://github.com/jitpack/jitpack.io


