This guide is going to help you when migrating from JSP based web application to a reactJS single page application. It gives details of all the available tools that will make the migration fast and easy. It will also help in understanding various conventions that are different in client-server architecture than the traditional server-based application.
Development Environment Setup
Starting from scratch and setting up a new react project is a painful experience so there are tools available to alleviate this pain.
- Webpack vs Create-react-app
React app does not need webpack and can be run all alone but there many advantages of using webpack which cannot be ignored. Webpack is a module bundler and runs only during development and not when the page actually loads in the browser. Here’s a list of task that webpack does during the development.
- Bundle resource: It bundles all the resource including all the css and js files allowing to use ‘require’ or ‘import’ statements in JavaScript code.
- Babel transpilation: It transpiles ES6 JavaScript code into ES5 allowing to use latest JavaScript feature without worrying about the older browser support.
- Development server: webpack provides its own development server so that the development can be done inside the actual server-like environment. Eventually, everything will run inside a server.
- Hot Module replacement: add or remove modules when the application is running without a full reload.
Webpack is not simple. It can be confusing many a time. Create-react-app comes for the rescue during such cases. Its very handy during the initial setup of a new react app. It also provides abstraction over the entire webpack configuration. So that you don’t have to manually configure webpack settings. The only drawback would be you don’t have control over what is happening behind the scenes. But again you can eject out anytime and switch to manual configuration. For beginners, it always good to start with create-react-app and than later switch to webpack once you get familiar with all the webpack configuration stuff.
Getting started with create-react-app is pretty simple. You need to have npm (node package manager) or yarn installed. Then run the following command:
- “npm install create-react-app”: it will install the react script in your machine.
- “create-react-app <project_name> “ : it will create the project with all the default configuration and folder structure.
- Switch to your project root and then run “npm start”. This is going to start the react app in development server.
- In order to deploy the app to production server run “npm build”. This is going to create a build folder. This contains a deployable version of the app.where Javascript and css files are all minified and compresses in one file. Deploy the content of build folder to an actual production server.
- Note that the entire webpack configurations are done behind the scene and you have no control over it. In order to take control of webpack configuration run “npm eject”. This is a one-time command and cannot be reverted. It will create all the webpack configuration files and you can change them as per requirement.
Deployment
There are various ways a react app can be deployed on production. React consists of only JavaScript files which can be hosted and accessed from anywhere from the cloud.
- This JavaScript bundle can be deployed inside the same war where the application is running. This can be achieved by running the npm script during the maven build command so that the build folder get created during the maven build and gets packaged inside the war. Now the war can be deployed any server over the cloud.
- The JavaScript bundle can be deployed outside the war but in the same tomcat instance. This way it does not need to be built during the maven build process and can be handled separately.
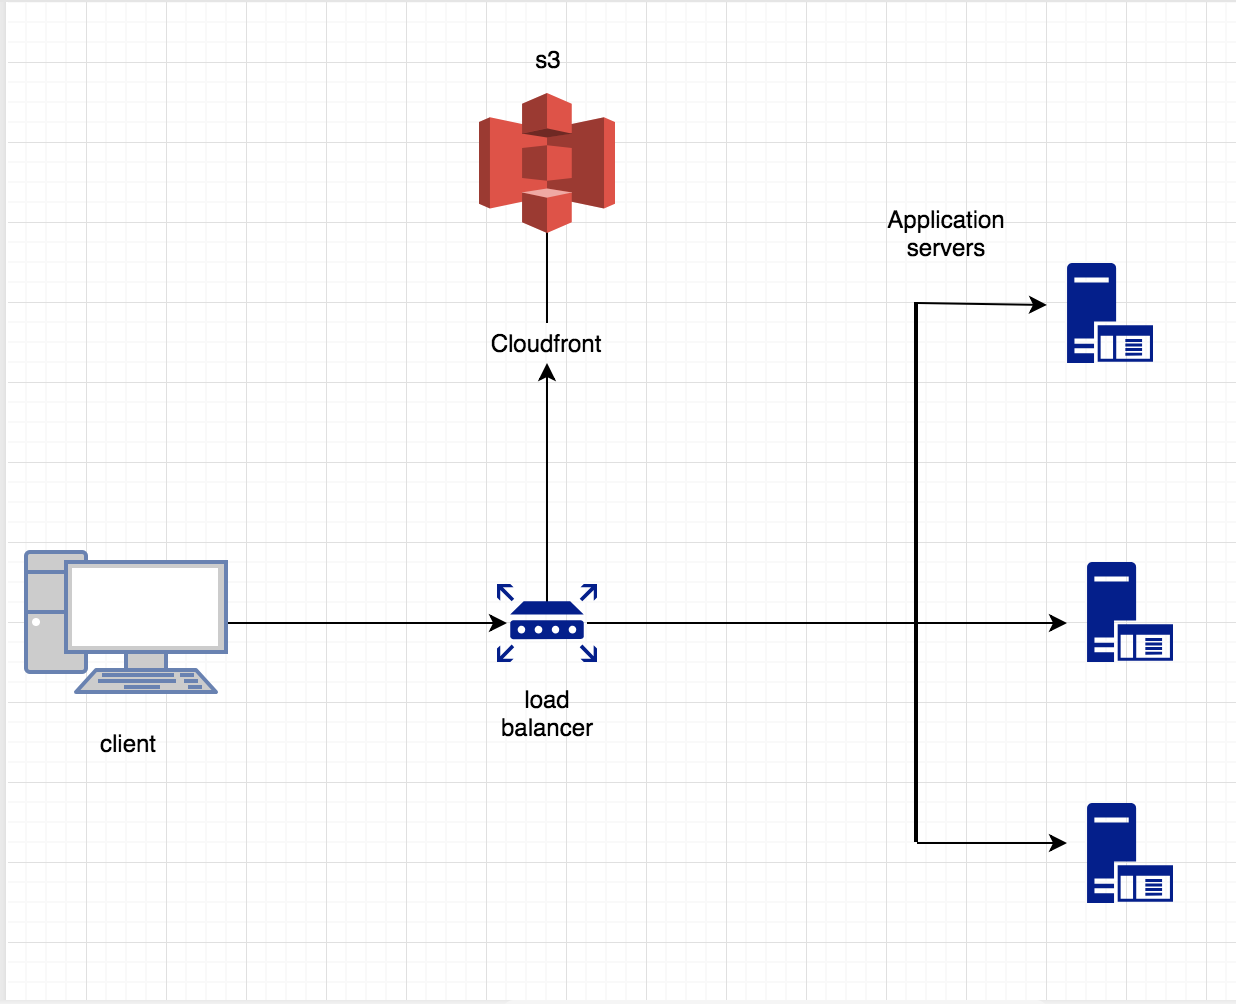
- Third way and the most popular way is to host these JavaScript files on S3 and access them using AWS CloudFront. This way there is no need to separately deploy them on all the servers.

Session Maintenance
Unlike JSP based application where sessions are maintained on the server side React app is single page application and maintains session on the client side and server side communication is done through stateless REST APIs. The server does not need to maintain any session. For a simple application, you can use react components ‘state’ for storing the state of the user called session. But things can get messy when the state needs to be shared among different components. It also gets cumbersome when the state needs to be traversed too many child components and each component will get reloaded if there is a change in state. For such cases, you can go for Redux. Redux is the state management tool for javascript applications. The main concept about redux is that the entire state of the application is stored in one central location and every component can access it from anywhere.
Convert Spring controller to RESTful API
Unlike the spring MVC where the view is also served from the server side react js app follows client-server architecture where all the view resides on the client side and business data is fetched from the server. So the first thing that needs to be done is to change the server side controller to return json response and not the JSP view pages. The client will make ajax calls to get the data from the server.


