Introduction
Making releases, taking screenshots, and updating metadata in Google Play Store are all facets of Android app growth. But you can automate these to save time for meaningful things like integrating functionality and repairing bugs.
Fastlane lets you do all that repeatedly and effectively. It’s an open-source tool that makes Android and iOS software distribution simpler. It helps you simplify any part of the workflow for creation and publication.
In this blog, we’ll learn how to use Fastlane to distribute an app on the firebase app distribution platform and add testers to test the build.
Why Fastlane
-
- It automatically takes screenshots.
- You can easily distribute new beta builds to testers so that you can get useful feedback quickly.
- You can streamline the whole app store rollout phase.
- Avoid the inconvenience of keeping track of code signing identities.
- You can easily integrate Fastlane into existing CI services, including Bitrise, Circle CI, Jenkins, Travis CI.
Getting Started
We will use our BLE Scanner app (you can read more about this app here) to automate a few tasks.
Take checkout of the project and make sure it is working fine, you can build it and run it on a device.
Installing Fastlane
There are many ways to install Fastlane, for more details visit here.
We will install it using Homebrew
brew install fastlane
Setting up Fastlane
Open the terminal and navigate to your project directory and then run the following command.
fastlane init

It will ask you to confirm a few specifics.
-
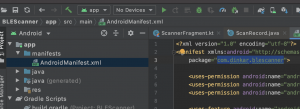
- When prompted, give the package name for your submission (e.g. com.dinkar.blescanner)
You can get the package name of your application from the AndroidManifest.xml file
- When prompted, give the package name for your submission (e.g. com.dinkar.blescanner)
-
- When asked for the path to your confidential json file, click enter. (we can set this up later)
- When asked if you intend to upload details to Google Play through Fastlane, reply ‘n’ (we can set this up later)
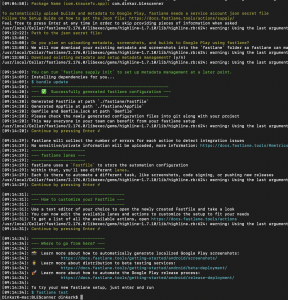
You’ll get a couple more prompts after that. To proceed, click Enter. When you’re done, run the following command to test the new fastlane configuration:
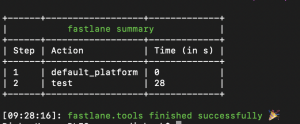
fastlane test
After successfully running the ‘test’ command you will see something like below.
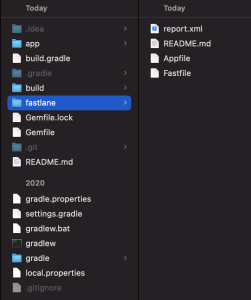
The following files can be found in the newly created `fastlane` directory:
Appfile: that specifies configuration data for your android app that is global
Fastfile: that specifies the “lanes” that govern how fastlane acts.
Configuring Fastlane
To store the automation setup, Fastlane uses a Fastfile. When you open Fastfile, you’ll see the following:
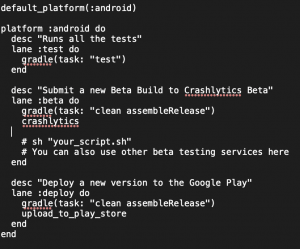
Fastlane splits multiple acts into lanes. A lane begins with lane: name, where the name of a lane is the name given. You can see three separate lanes inside the file: test, beta and deploy.
The following is a list of the actions that each lane performs:
-
- test: Performs all the project tests(unit,instrumented) using the Gradle action.
- beta: Uses the gradle action followed by the crashlytics action to send a beta build to Firebase App Distribution.
- deploy: Use the gradle action followed by the upload to play store action and deploy a new update to Google Play.
Create new Lane
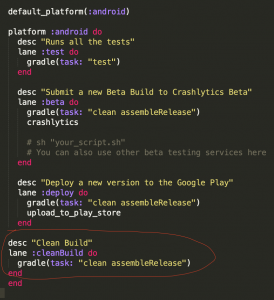
Let’s edit Fastfile and add a new lane to clean build our app.
To add a new lane we have to edit `platform :android do`
Add lane cleanBuild by adding something like below.
Open the terminal and run the following command
fastlane cleanBuild
You will get the following message after successful execution.
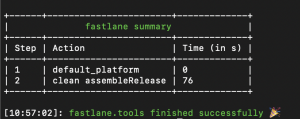
Now this tells us how we can create a lane and how to use that. Let’s Automate beta app distribution using firebase app distribution
Automating Firebase App Distribution
Once you are done with a new feature, you’ll want to share it with beta testers or your QA to test the stability of the build and gather feedback before releasing it on the Play Store.
For this kind of distribution, we use the highly recommended Firebase app distribution tool.
Create a Firebase Project
To use any of the firebase tools in our app we need to have a firebase project for it. Let’s create the one for our BLE Scanner App
-
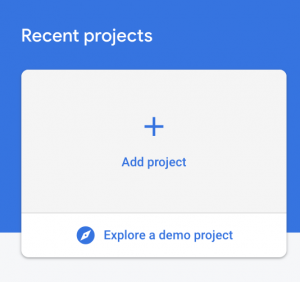
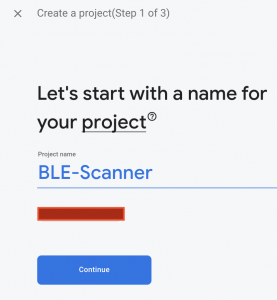
- Go to https://console.firebase.google.com/ and create a new project by clicking “Add Project”
-
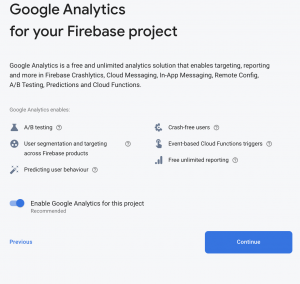
- Give any name for your project and click `Continue`
-
-
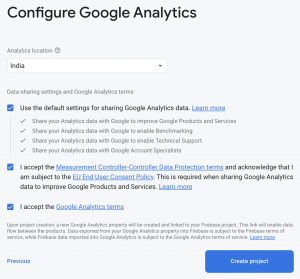
- Select your Analytics location and create the project.
- Select your Analytics location and create the project.
-
Add Android app to our Firebase project
-
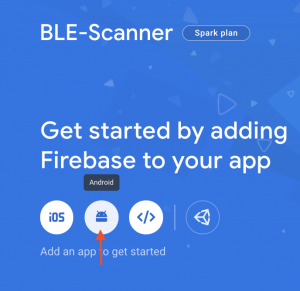
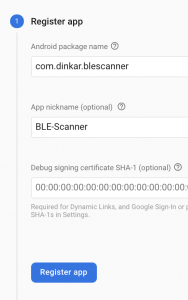
- Click on the Android icon to create an Android app in the firebase project
-
- After filing the relevant info click on the Register app
-
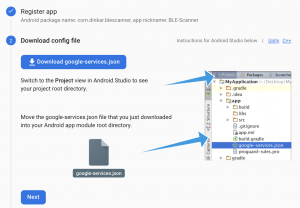
- Download and add google-services.json to your project as per the instruction provided.
-
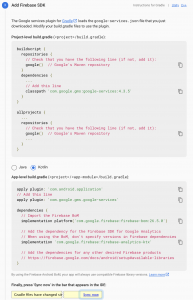
- Click Next after following the instructions to connect the Firebase SDK to your project.
-
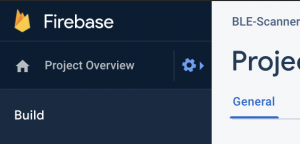
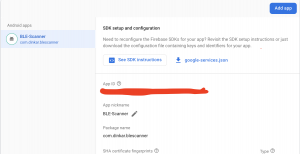
- Go to project settings
-
- Get App Id. Fastlane will ask you for it.
Install FirebaseCLI
Fastlane needs FirebaseCLI to connect to the Firebase server for uploading the build.
- Open terminal and run command ‘ curl -sL https://firebase.tools | bash ’
- After successful installation login to firebase CLI by running the command in terminal
firebase login - After successful login, to test that the CLI is properly installed, access your account by listing your Firebase projects run ` firebase projects:list ` and check for the project you have created.
Install the Fastlane plugin for Firebase App Distribution
Run the following command in terminal
fastlane add_plugin firebase_app_distribution
Select `Y’ for the prompt `Should fastlane modify the Gemfile at path`
You’re now ready to submit various versions of the app to different groups of testers using Firebase.
Enabling Firebase App Distribution for your app
-
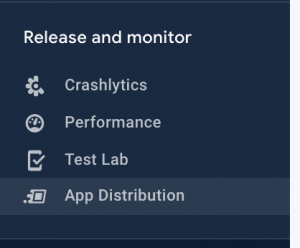
- Select App Distribution from the left pane of the console
-
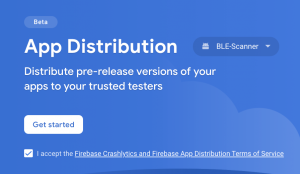
- Accept TnC and click on `Get started`
-
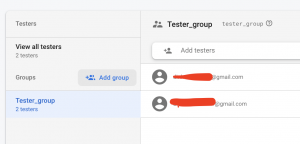
- Now let’s create a test group with a few testers, whom we will send our build for testing.
Distribute app for testing
Open Fastfile and overwrite the beta lane with the following, replacing the `app` with the App ID you copied earlier:

The whole Fastfile will be looking like this
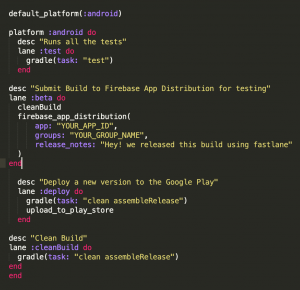
Replace YOUR_APP_ID and YOUR_GROUP_NAME with correct values.
After editing Fastfile run the following command on the terminal.
fastlane beta
After the successful execution of the above command, you will see something like below.
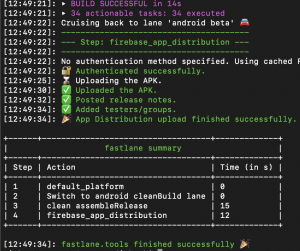
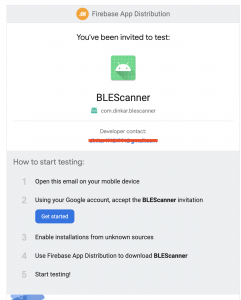
The tester would receive email notification for Build.
![]()
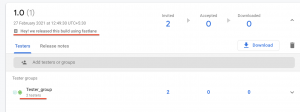
You can also see the Firebase console to verify whether the new build is uploaded with release notes and testers have been added to the same or not.
Handle Flavors
We can have multiple flavors of our app depending upon different criteria, we can have different flavors for different environments like production, staging, QA and development.
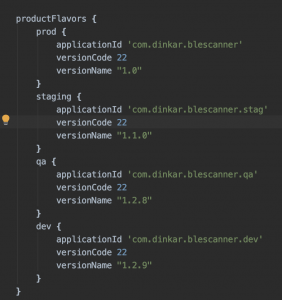
To run a specific flavor we can run the following command
fastlane beta app:flavorName
Here flavorName can be prod,staging,qa,dev
If you provide a flavor with an app key, Fastfile will run gradle assembleReleaseFlavor. Otherwise, it will run gradle assembleRelease to build all build flavors.
Best Practices
-
- If possible, do not keep Fastlane configuration files in the repository.
- To exclude generated and temporary files getting committed in the repo, add the following lines to the repository’s.gitignore file:
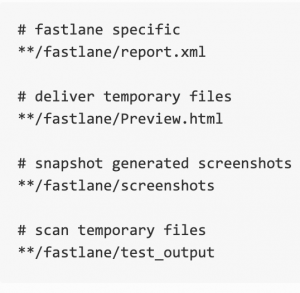
-
- It’s also a smart idea to keep screenshots and other distribution items out of the repository. If you have to re-generate, use Fastlane.
- It is recommended that you use Git Tags or custom triggers rather than commit for App deployment.
Congratulations!
We have successfully automated the task of building an android app and distributing it to QA, now it’s as simple as one command execution “fastlane beta” which can be done by any non-technical person as well.
For more details and an in-depth view, you can find the code here
References:https://fastlane.tools/,https://docs.fastlane.tools/


