In part 1 and part 2 of this three-part blog series, we built a .NET application and made the changes to run it on Docker using Visual Studio as our IDE. In this final part, let us explore the container orchestration tool supported by Visual Studio. Before we explore the tool, let us first understand the basics of Docker Compose.
Docker Compose
Visual Studio provides container orchestrator support in the form of Docker Compose.
Let us add that to our project. Right-click the WeatherForecastAPI project -> Add -> Container Orchestrator support.
Select the target OS as Linux and click ‘No’ when asked to override Dockerfile as we already have Dockerfile in the project. Upon adding a container orchestrator support, we would see that a new project named docker-compose containing a file named docker-compose.yml. If we add container orchestrator support to the other two projects, it will update this same docker-compose.yml file. This is what it looks like.
It has one service section containing three sub-sections wherein each sub-section specifies how the docker-compose will configure and bring up the application. We will add two more sub-sections for our database and rabbit MQ services, and modify the docker-compose.yml file to look like this.
Let us see the changes made:
- We have added two sections under services: rabbitmq and weatherpostgres for our message queue and database containers.
- There is a new depends_on entry for each service that depends on other services. For example, the API depends on the database, and so it has a depends_on access that specifies the weatherpostgres. Similarly, the processor service depends on both the message queue and the database; thus, it has depends_on on entry with weatherpostgres and rabbitmq.
- The rabbitmq service specifies an image from the Docker hub called rabbitmq and starts a container with the specified ports (15672) open for management.
- The weatherpostgres service also specifies an image from the Docker hub called Postgres and contains other entries where the db_volumes and username/password for connecting to the database are limited.
- The ports entry in each service section implies ports mapping between the host machine and the container. The first port specifies the host port, and the second specifies the container port. So, a port mapping of “8081:80” in weatherforecastadmin implies that the container port of 80 is mapped to the host port of 8081. Now, the application will be accessible from 8081 on the host machine. Also, note that the host port should be exposed, and the application should be accessible on the same port.
- The build section specifies the location of the Dockerfile to build the container image.
Our database and message queue are also configured to run as a container. If you change the appsettings.json file in each project to use the respective name from docker-compose rather than the host.docker.internal, applications will interact with the containers instead of localhost for database and message queues.
With all these changes, if we now run the application with Docker Compose, this option was included while adding the container orchestrator support to our projects. We will see that Visual Studio builds all the container images and opens the API project’s swagger page once done. There is just one problem now if we call the Get API. It throws an error saying the database WeatherDb does not exist. This seems to be a valid error since we were running the application on our local database. We manually ran the migration scripts that created the database and the tables needed for our application. But, since our database is also containerized, we need to make sure the migrations run before any calls are made to it. We will work around this problem by running the migrations on the application startup of the API project. Modify the ConfigureServices method like this.
We are calling the Migrate method on our DbContext class that already knows which database to connect to and will run the migrations on the database. It may not be the standard process, but this will work for now for our simple use case.
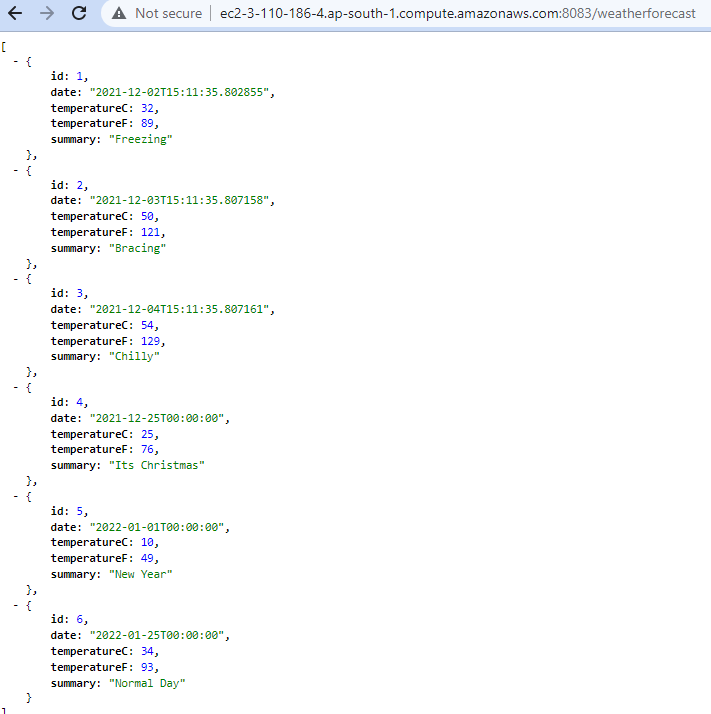
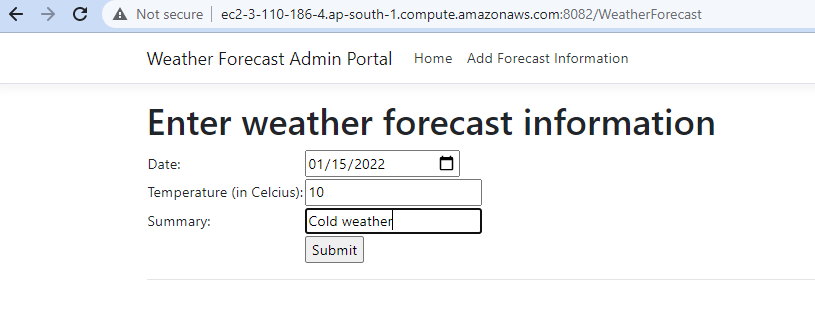
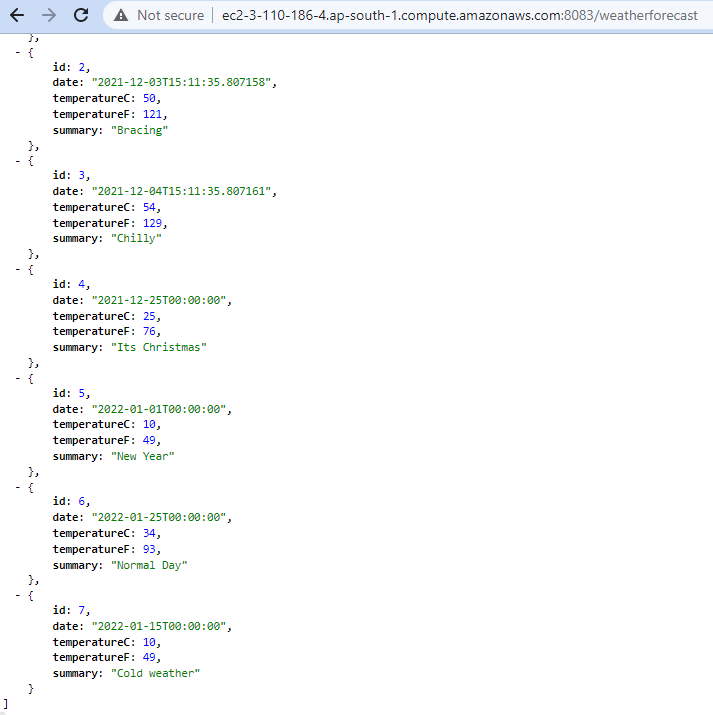
If we run the Docker Compose and call the Get API, it will return the seed data that we inserted through the InitialMigration. Also, if we open the WeatherForecastAdmin application on port 8081 and enter some weather forecast data, we will see that the new data is displayed from the Get API.
Run Application on Linux
We were doing all the development on Windows, and running the application on Docker was also carried out on Windows only. When we added Docker support, we selected Linux as the target OS, which means it should be able to run on Linux. Now let us see it in action. The code of the application is available on Github. We need a Linux box with git and Docker installed, and we are done. For this, we have created an EC2 instance of Ubuntu and installed git and Docker
- Check out the git repo using the following command
gh repo clone mmoiyadi/WeatherForecast
- Run the following command to build the container images
sudo docker-compose build
- And finally, start all the containers with the following command
sudo docker-compose up
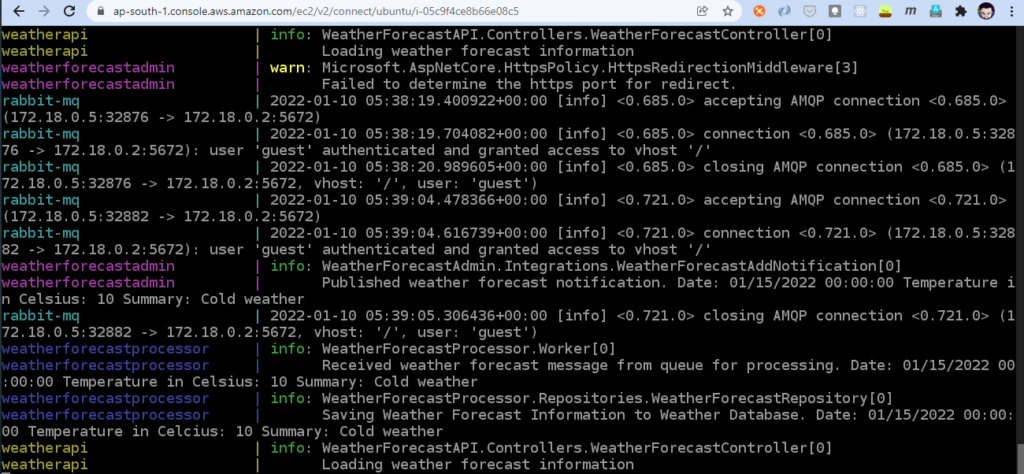
We can see from the console logs that all our containers have started. Open the public URL of the EC2 instance with the host port of Web API and get the data from the database container. In the same way, if we submit the weather forecast data from the admin application, just make sure the port is correct. The data is submitted and written to the database running on the container and the same is displayed as the output when we call the weather forecast API again. We can see the application logs of all the containers in the terminal.
Conclusion
We have successfully built a .NET application and containerized it using Docker and Docker Compose. Visual Studio provides native support for containerization and container orchestration, making development, debugging, and deployment much more effortless. Do carry out the process & share your experience with us.
Happy Coding!!!