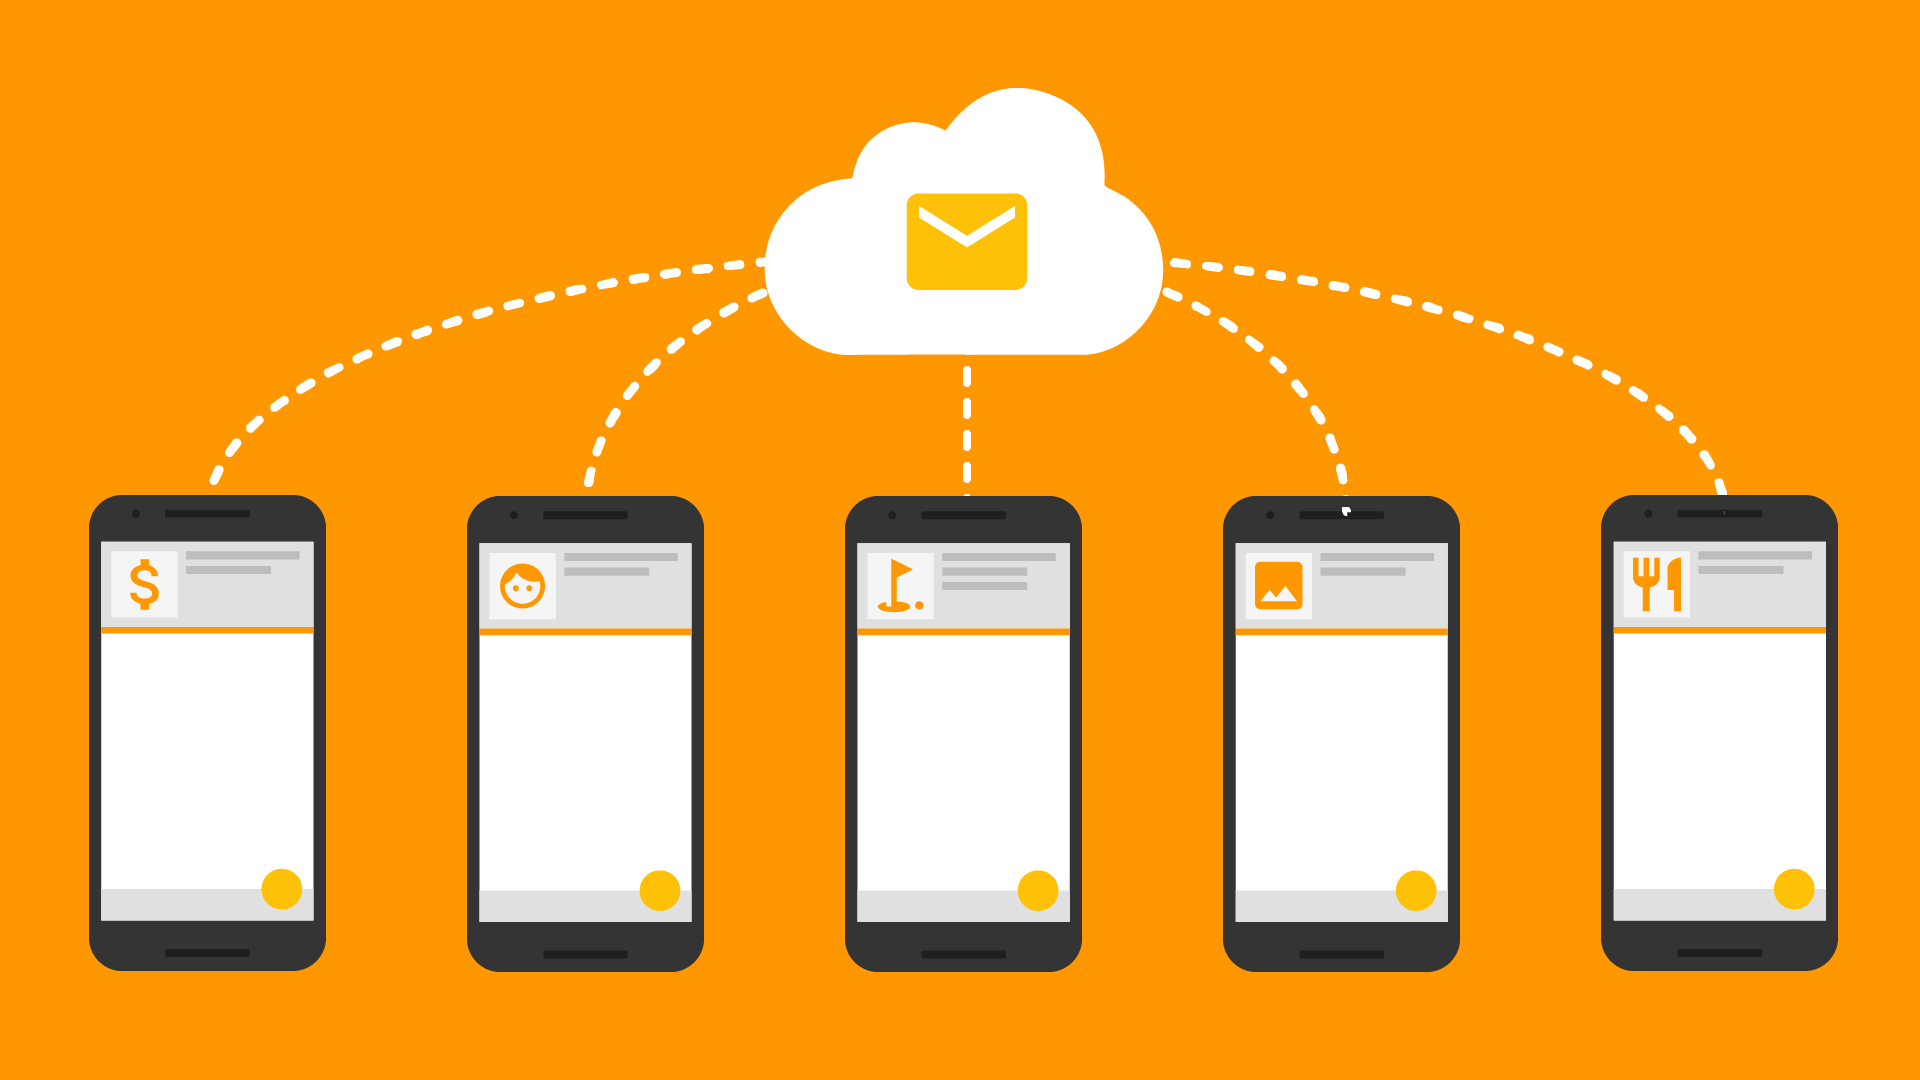
Cloud messaging or push notification is one of those “topics” that gets left out. Primarily because we are too busy beautifying the app, or working on a new feature, or we think it isn’t a big deal. Push notifications are as big a deal as any. Whether you want to re-engage your users, or deliver personalised content, or display targeted advertisements, push notification is the way to go.
In this blog we will look at the pre-requisites and steps required to integrate Firebase Cloud Messaging (FCM) in iOS apps. For convenience, I have divided the content into the following sections:
- FCM introduction
- Setting up FCM
- Handling FCM
- Sending FCM.
There is a bonus section at the end with advanced content like sending data with FCM, etc.
Before we dive into account creation and pod installation, here is the list of pre-requisites:
- An actual iPhone or iPad. Push messages cannot be sent to simulators so you require an actual device to send push notifications.
- A Mac computer (Mac book, Mac mini). From my experience, a VM running on Windows or ubuntu machine will not work.
- Paid Apple developer account. Free account has its limitations and push messaging is one of them.
FCM Introduction
Firebase is Google’s Backend as a service solution (a.k.a BaaS and MBaaS (Mobile BaaS)). Firebase offers a wonderful suite of products for client and backend and FCM is one of them.
Straight from the official docs: FCM is a cross-platform messaging solution that lets you reliably deliver messages at no cost. Using FCM, you can notify a client app that new email or other data is available to sync. You can send notification messages to drive user re-engagement and retention. For use cases such as instant messaging, a message can transfer a payload of up to 4KB to a client app. Firebase delivers 95% of push messages in under 250 milliseconds.
Firebase identifies each device for an app by a unique registration ID or token. This token is required to send individual push notifications. The registration ID is unique per device per app. Hence, do not worry if more than one of your apps is in a user’s device, the registration ID is different.
Why choose Firebase?
- It is free for unlimited usage (no hidden charges or limits).
- It is cross platform.
- The latency and performance is unmatched.
- There are various sending options like from firebase console, or to a single device or to a group of devices or to devices/users subscribed to certain topics.
- Analytics and conversion ratio is available right in the Firebase dashboard.
Setting up FCM
This is the most critical and time consuming step in sending FCM or Apple Push Notification Service (APNS), in general. Once this is done, sending an FCM message is as easy as issuing a curl command. Lets begin by creating an xcode project with a single view application. By the way, this tutorial is in swift 3 (of course). I know that swift 4 is out and I will upgrade to swift 4 sometime later.
Perform the following:
- Create an xcode project for iPhone with the name “FCM-blast”.
Ensure you have a unique bundler identifier. - Go to firebase.google.com and hit console on top right.
- Create a new project.
The welcome screen displays. - Click on Add Firebase to your iOS app.
The following screen displays.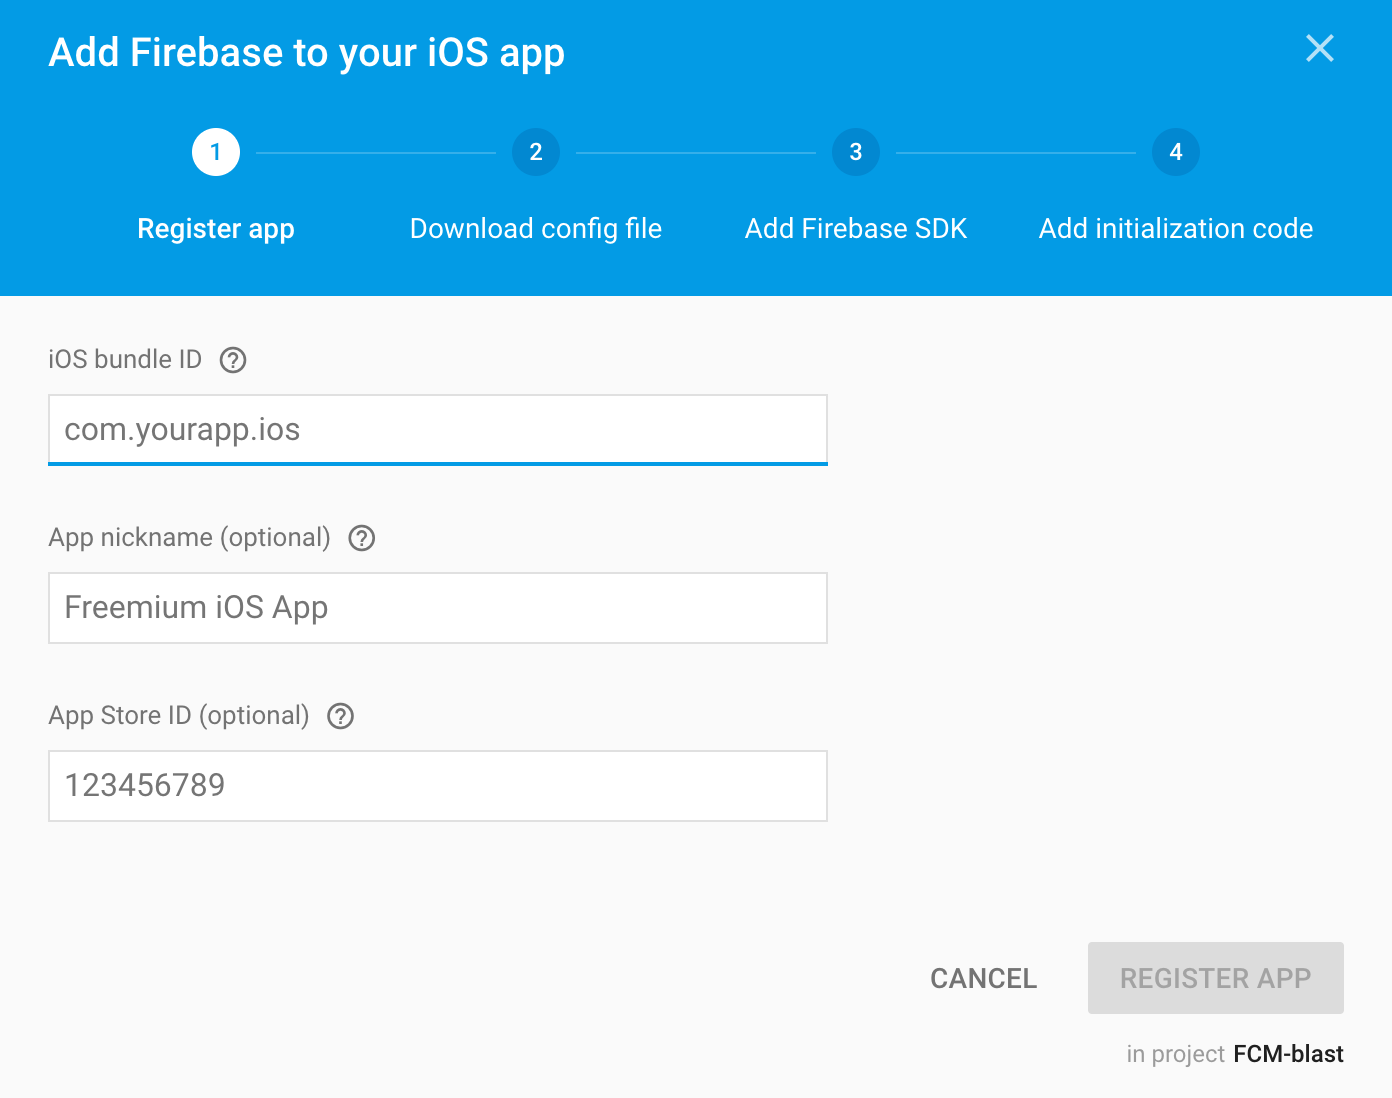
- Enter the unique bundle identifier that was used to create the xcode project, pick a nickname and click Register App.
- Download the GoogleService-Info.plist config file. Add this file on the same level as your xcode projects info.plist file.
This file contains all the info about firebase project that we have created. We don’t have to enter the app id or project id. Notice that the FCM-Blast.entitlements file gets added when the push notification is enabled from Application > Capabilities. If you don’t see push notifications there, just follow along, you must enable the push notification setting on the Apple developer console.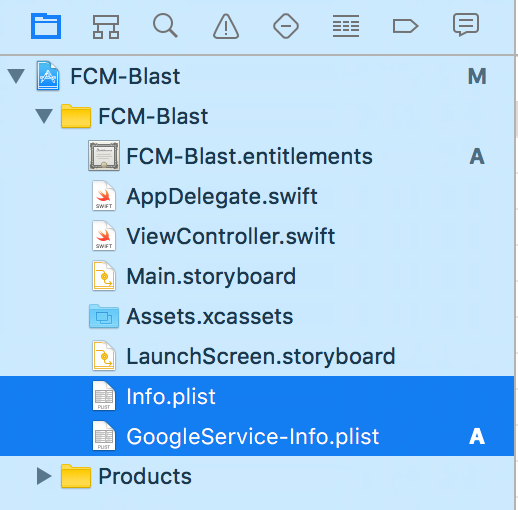
- Close xcode. Navigate to the project folder in terminal and perform a pod init from the terminal. This adds a podfile to your project. Add the following pods to your project’s podfile:
- pod ‘Firebase/Core’
- pod ‘Firebase/Messaging’.
- Perform a pod install from terminal to install all pods and dependencies and open the auto created .xcworkspace file.
- In your AppDelegate.swift file add FirebaseApp.configure() under did finish launching with options function.
This completes the basic firebase setup.
Next step is to create the certificate that firebase uses to send push notifications. Perform the following steps to generate a development p12 certificate:
Ok lets review what we have done till now. We have created an iPhone / iPad project, added firebase pods, created a new project in firebase console, added the GoogleService-info.plist file in our project, then registered our app in apple developer console and created certificate, generated a .p12 certificate, added it to firebase. Whew!!! that a lot of setup. The good news is we are done with the setup, now we can code. If you run into any issues you can refer firebase official docs.
Handling FCM in our project
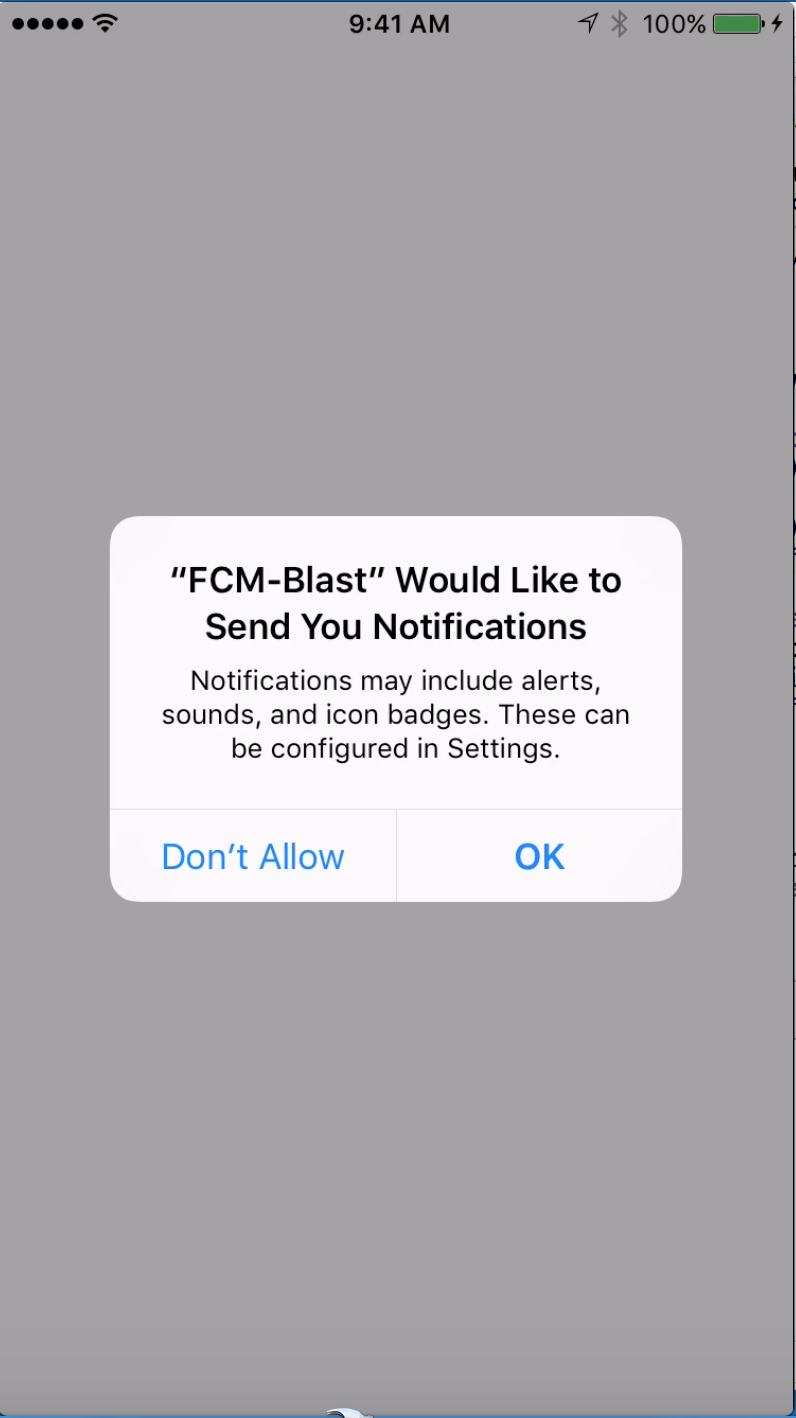
Before we can send push notification, we need to ask user’s permission, I am sure you have seen a notification permission prompt in many iOS apps. Unless user allows our app to send notification we can’t. Here is how you request permission, since my app supports iOS 9 I have added conditional code. Make sure the AppDelegate adopts UNUserNotificationCenterDelegate. Also we want to get a hang of FCM registration Id, so we can send push notification to a particular device.
https://gist.github.com/drulabs/fbd02525ac61336f9d34ef64235bae00
That’s it, we are basically done. Now we can send push notification. The extra code is just to get token information. Above code just prints the registration token, ideally it should be saved in some backend by mapping it with some sort of user id like email id or username. This token can be used to send individual push notification. Firebase also allows us to send data with push notifications, this data is bundled as dictionary of String and Any. Here is how to receive data:
https://gist.github.com/drulabs/7774951b2b13752f477f15e2ad0d30e5
Next step is to create the certificate that firebase uses to send push notifications. Perform the following steps to generate a development p12 certificate:
- Log in to developer.apple.com > Account.
- Select Certificates, Identifiers & Profile.
- In the left pane, select Identifiers > App IDs and click on + to register a new add id, if not already added. Ensure push notification is enabled when registering the app.
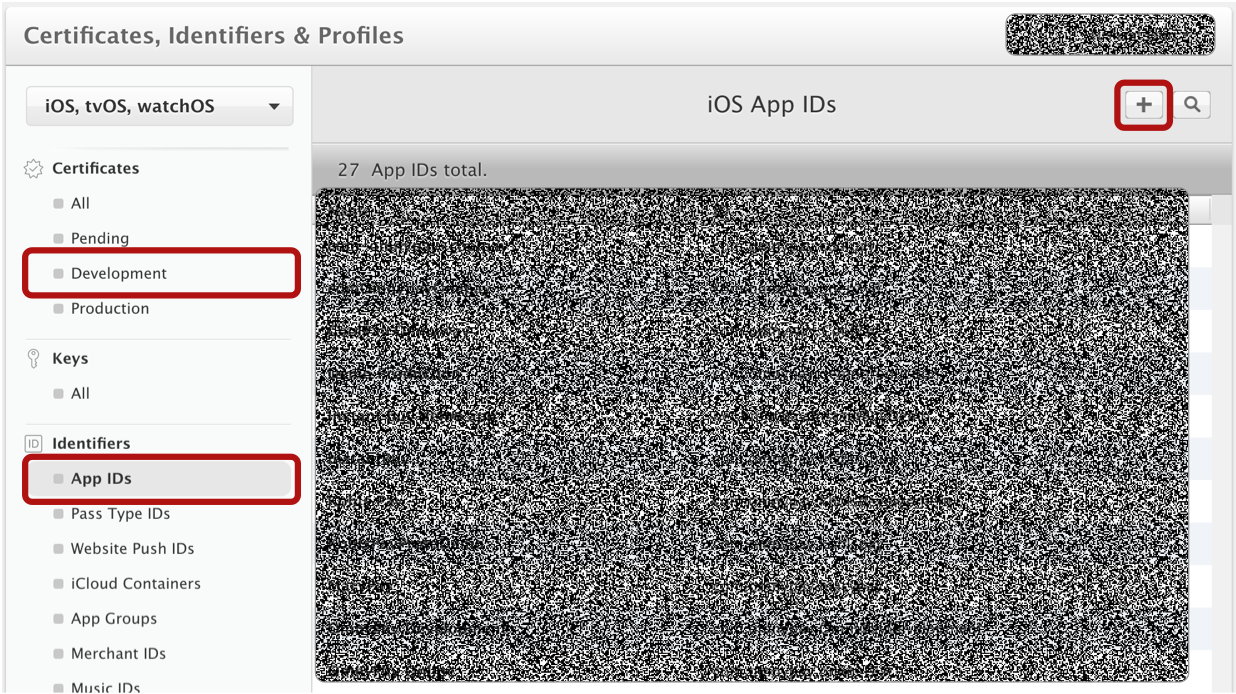
- Select Certificates > Development and click + to add a development certificate and select Apple push notification service SSL. Click continue.
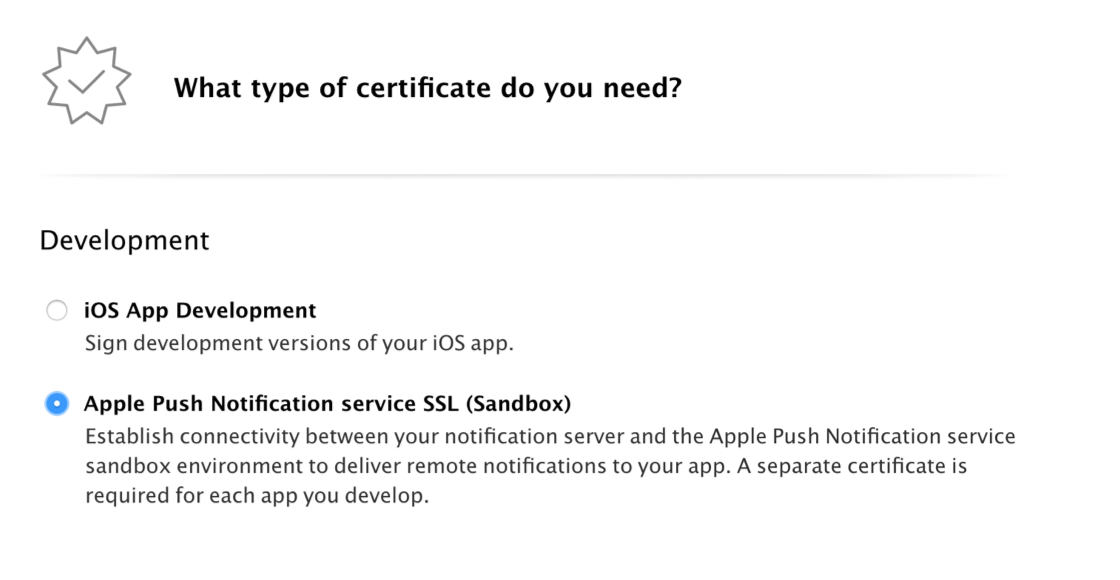
- Select your project from the dropdown and click Next.
- Read the documentation about certificate and click Next.
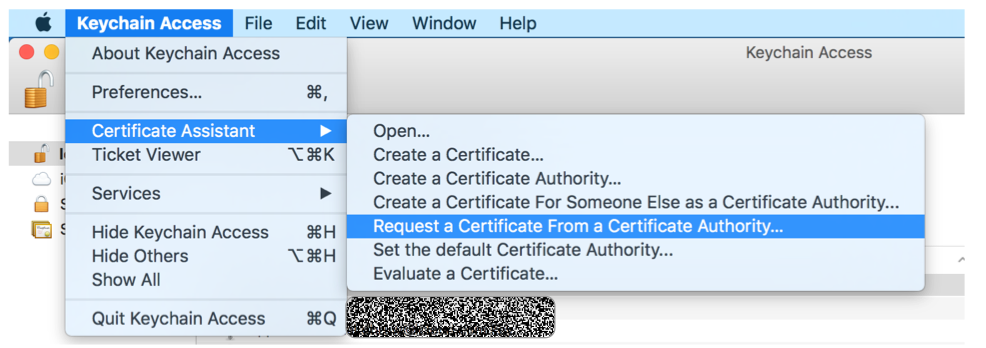
Apple asks for a CSR or .cerSigningRequest file. - Open Keychain Access in your Mac computer and click Keychain Access > Certificate Assistant > Request a Certificate From a Certificate Authority.
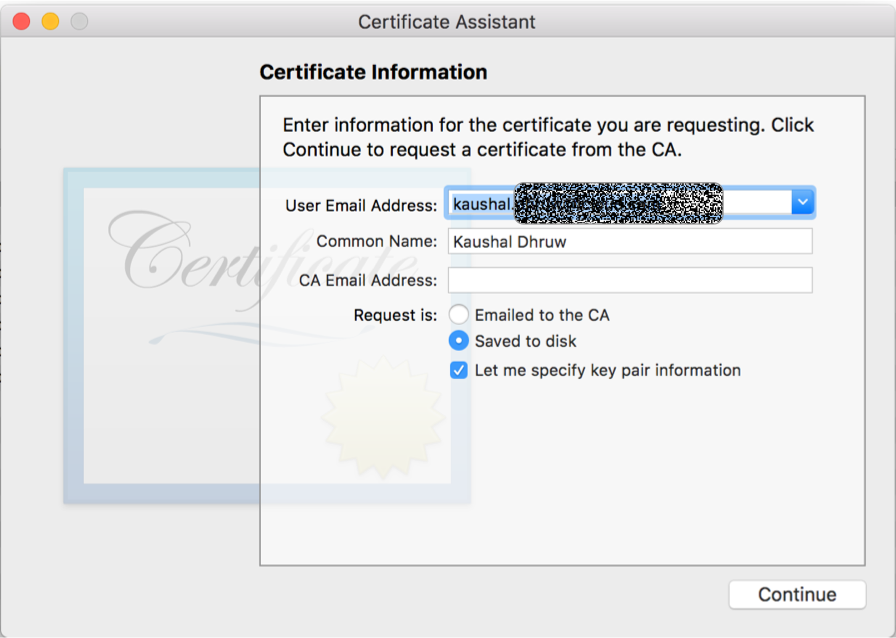
- Ensure to select Saved to disk and Let me specify key pair information and click Continue.
- Save the .cerSigningRequest file.
- Now, go to your browser where we left off. It should display Upload a CSR file.
- Click on Choose file and select the .cerSigningRequest file that you saved previously. Click Continue.
The following page displays: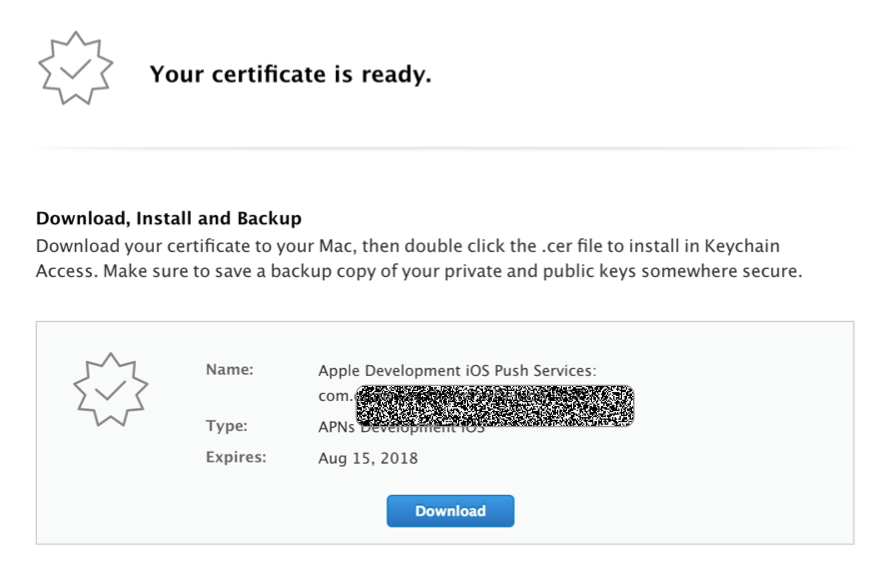
- Click Download and save the certificate file with extension .cer. Double click on this certificate to install it. It will open Keychain Access and install the certificate on your computer.
- Now all we have to do is find the newly installed certificate on Keychain access, click on the developer name or your name, control click (or right click) and click export. This will generate a .p12 file. save it in your computer.
Now we need to provide this certificate to firebase so it can send push notification to our app. - Go to your firebase project page, click Overview > Project settings.
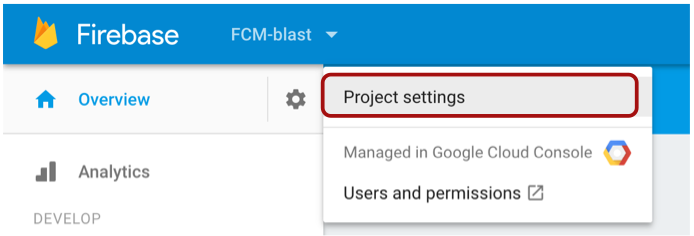
- Click Cloud Messaging tab and scroll to the bottom. Under “iOS app configuration”, click Upload your Development APNs certificate. Upload the .p12 certificate that we created (or rather exported from keychain access) in the previous step. Add password if you have added any during the certificate creation.
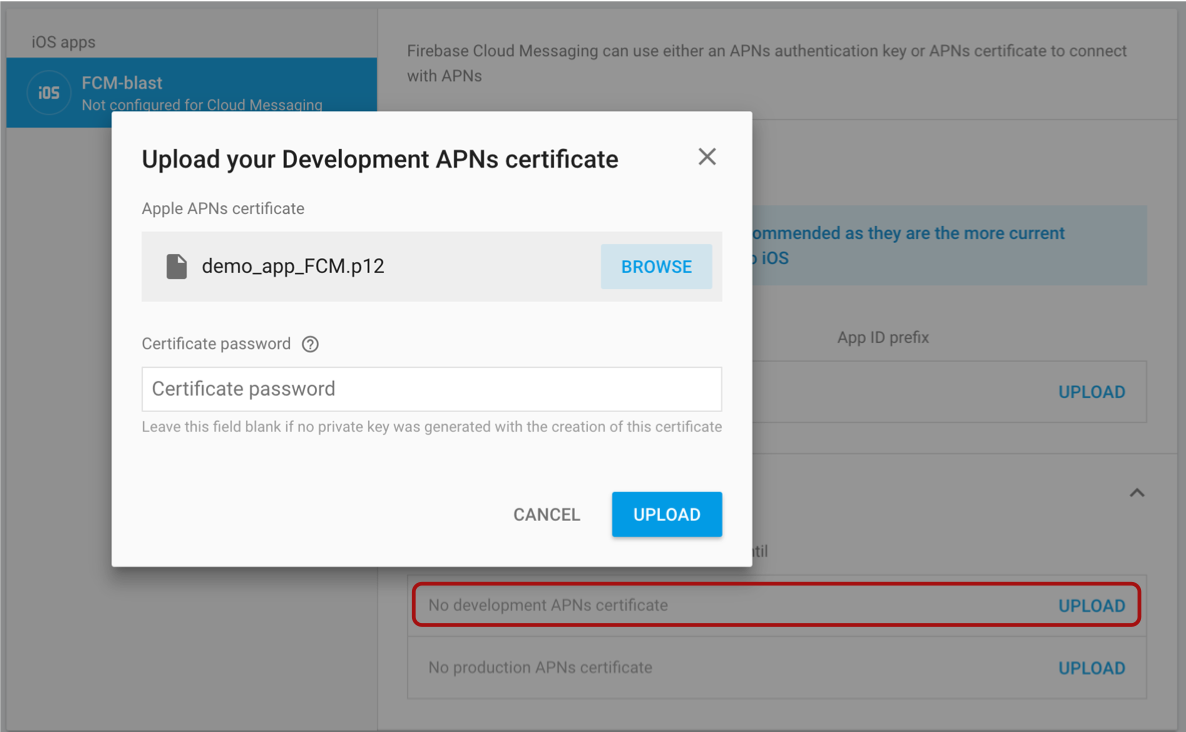
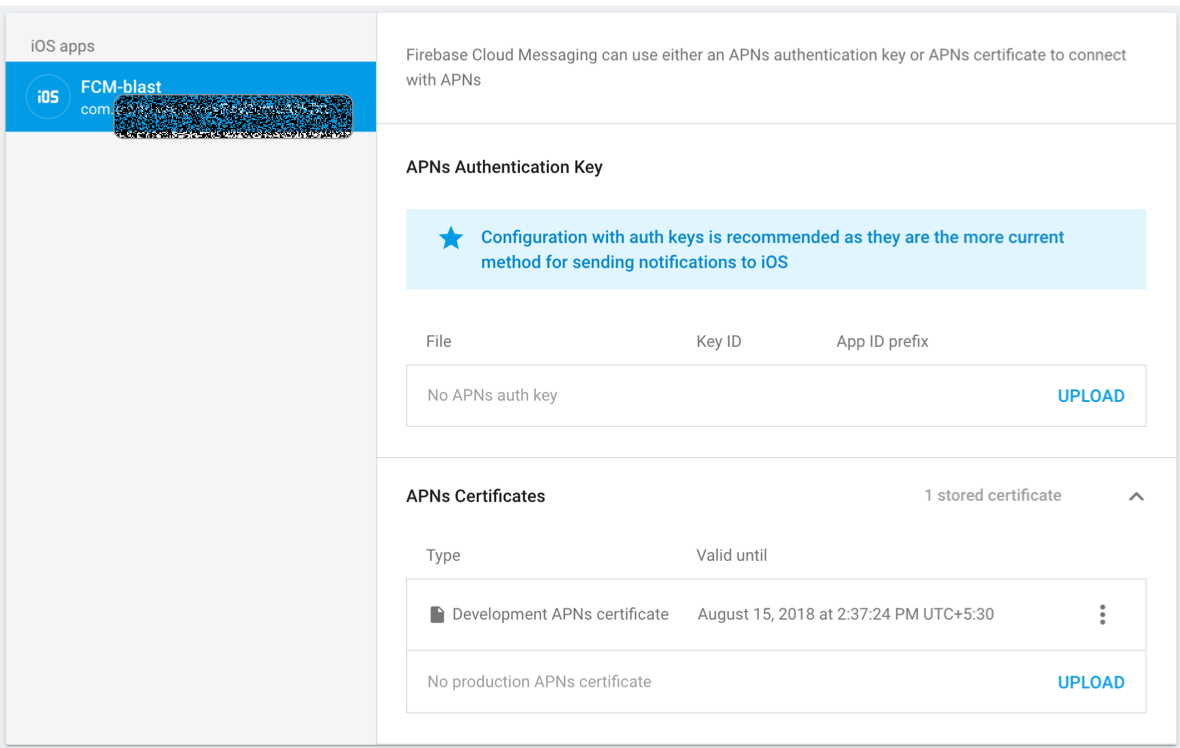
- As you can see at the bottom of the above screenshot, a development certificate file has been added. For production usages, create a production certificate and upload in the production section (see that upload button at the very bottom of screenshot above, that’s it).
We are now done with the setup, and can start to code. If you run into any issues you can refer firebase official docs.
Handling FCM in our project
Before we can send push notification, we need to seek the user’s permission. I am sure you have seen a notification permission prompt in many iOS apps. Here is how you request permission: since my app supports iOS 9 I have added conditional code. Ensure the AppDelegate adopts UNUserNotificationCenterDelegate. Also we want to get a hang of FCM registration Id, so we can send push notification to a particular device.
That’s it, we are basically done. Now we can send push notifications. The extra code is just to get token information. Above code just prints the registration token, ideally it should be saved in some backend by mapping it with some sort of user id like email id or username. This token can be used to send individual push notifications. Firebase also allows us to send data with push notifications. This data is bundled as a dictionary of String and Any. Here is how to receive data:
Just override the following function in AppDelegate and it gets called whenever push notification is tapped or when app is open and push notification is received.
https://gist.github.com/drulabs/7774951b2b13752f477f15e2ad0d30e5
This is all there is to handling FCM message in an iOS app. This method gets called immediately if the app is in the foreground, but no notification is displayed in notification tray. In case the app is in the background, this function gets called when user taps on the notification and the app opens. Now lets move on to the last section and see how to send these push notifications.
Sending FCM push notifications
There are several ways to send FCM push notifications. The easiest is from Firebase console. Click on Notification on the left navigation pane in Firebase console of your project.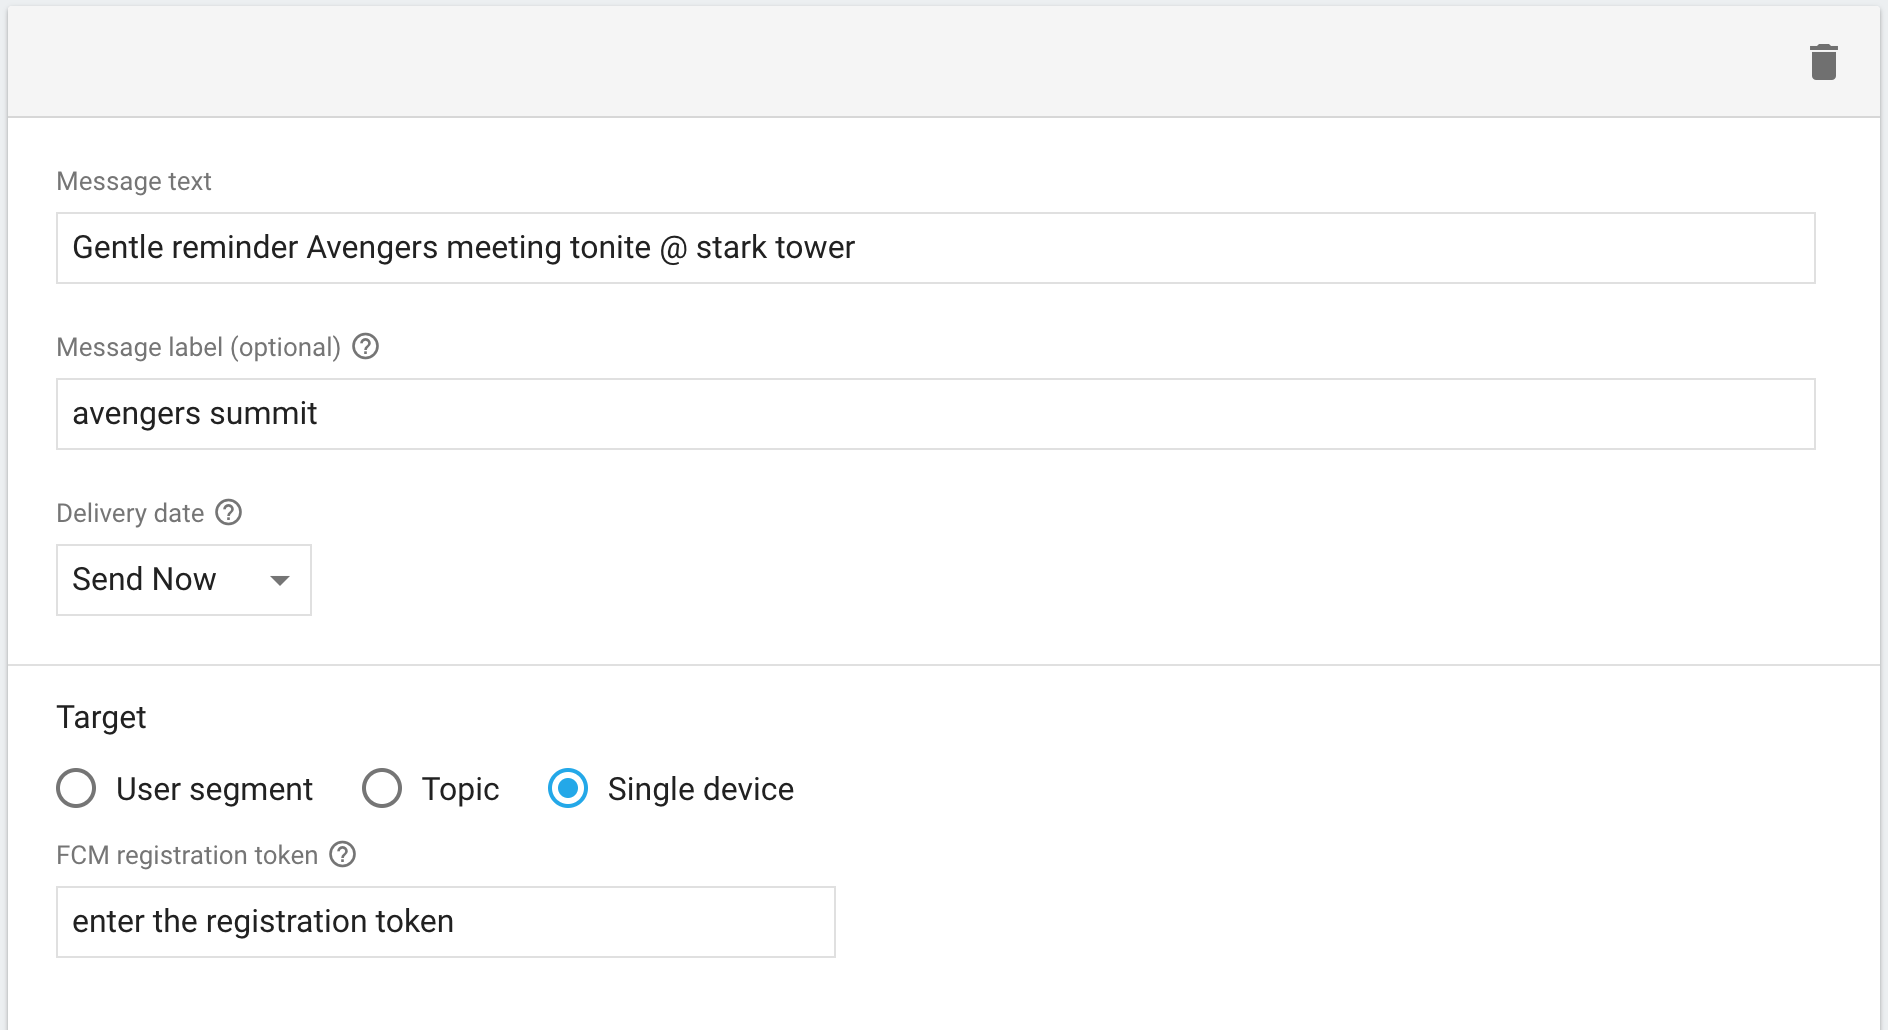
There is an option to enter text, select delivery date and target audience. Target audience could be all users, or a segment of users, or user subscribed to a particular topic, or to a single user or device (registration token is required in this case). This is good for maybe announcements or one time offers, or things like that. What we want is to be able to send push notifications programatically, for use cases like sending an offer to a user after she successfully purchases some item from your online store. Fortunately firebase provides a way for us to send notification via simple http post commands. Here is a sample structure of FCM message.
https://gist.github.com/drulabs/8f8cdf9eeae9ffa7eeda14df0c4e9ee7
Sample JSON above has three main fields. registration ids field contains who to send this message to, notification field if present displays notification on device if (app is not in foreground), the data field is the data that gets delivered inside. Data field is very helpful in various use cases, like you receive a push notification that you have received an email from a friend, when you tap that, the email is opened automatically without taking you to inbox, this navigation is triggered based on data received in did receive remote notification. There is a lot more customization that can go inside the above JSON. You can refer to the official docs for more details.
You May Interested In: React Web Apps using Firebase
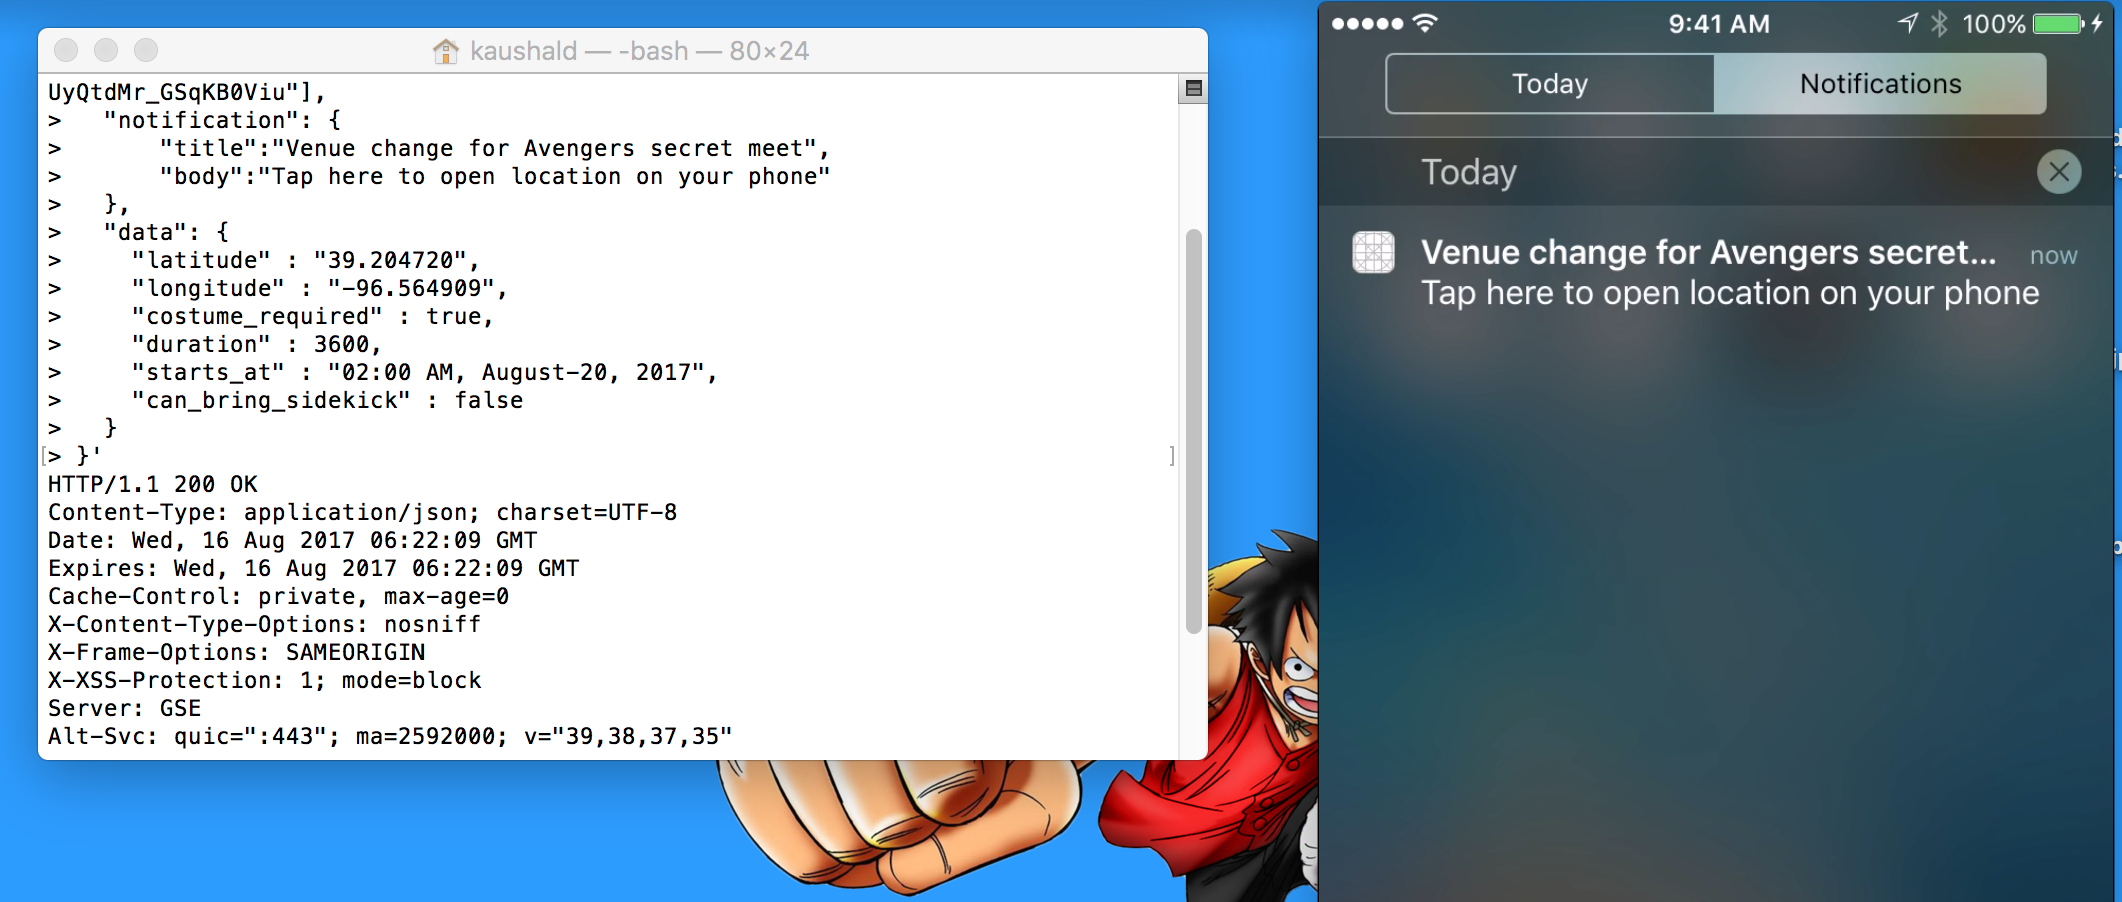
How do you send an FCM push notification from curl command or simple http post? Here is how:
https://gist.github.com/drulabs/c9f6802790c92d74cb7eb2427097899a
You can get your projects server key by going into project settings > cloud messaging > server key.
Here is what it looks like:
Let me know what you think. Got any questions shoot below in comments.
-Kaushal Dhruw (@drulabs twitter / github / stackoverflow)

