An API (Application Programming Interface) is a software that allows two applications to talk to each other.
In this tutorial, We will explore different ways to create a Django Rest Framework (DFR) API. We will build Django REST application with Django 2.X.X that allows users to create, edit, and delete API.
Why DRF:
Django REST framework is a powerful and flexible toolkit for building Web APIs.
Some reasons you might want to use REST framework:
- The Web browsable API is a huge usability win for your developers.
- Authentication policies including packages for OAuth1a and OAuth2.
- Serialization that supports both ORM and non-ORM data sources.
- Customizable all the way down – just use regular function-based views if you don’t need the more powerful features.
- Extensive documentation, and great community support.
- Used and trusted by internationally recognized companies including Mozilla, Red Hat, Heroku, and Eventbrite.
Traditionally, Django is known to many developers as an MVC Web Framework, but it can also be used to build a backend, which in this case is an API. We shall see how you can build a backend with it.
Let’s get started
In this blog, you will be building a simple API for a simple employee management service.
Setup your Dev environment:
Please install python 3. I am using python 3.7.3 here
You can check your python version using the command
$ python –V
Python 3.7.3
After installing python, you can go ahead and create a working directory for your API and then set up a virtual environment.
You can set up virtual env. by below command
$ pip install virtualenv
Create directory employee-management and use that directory
$ mkdir employee-management && cd employee-management
# creates virtual environment named drf_api
 employee-management $ virtualenv --python=python3 drf_api
# activate the virtual environment named drf_api
 employee-management e$ source drf_api/bin/activate
This will activate the virtual env that you have just created.
Let’s install Django and djangorestframework in your virtual env.
I will be installing Django 2.2.3 and djangorestframework 3.9.4
(drf_api) employee-management $pip install Django=2.2.3
(drf_api) employee-management $pip install djangorestframework =3.9.4
Start Project:
After setting up your Dev environment, let’s start a Django Project. I am creating a project with name API
(drf_api) employee-management $ django-admin.py startproject api

(drf_api) employee-management $ cd api
Now create a Django app. I am creating employees app
(drf_api) employee-management $ django-admin.py startapp employees
Now you will have a directory structure like this:
api/

    manage.py

    api/

        __init__.py

        settings.py

        urls.py

        wsgi.py

    employees/

        migrations/

             __init__.py

        __init__.py

        admin.py

        apps.py

        models.py

        tests.py

        views.py

    drf_api/
The app and project are now created. We will now sync the database. By default, Django uses sqlite3 as a database.
If you open api/settings.py you will notice this:
DATABASES = {
     'default': {
         'ENGINE': 'django.db.backends.sqlite3',
         'NAME': os.path.join(BASE_DIR, 'db.sqlite3'),
     }
 }
You can change the DB engine as per your need. E.g PostgreSQL etc.
We will create an initial admin user and set a password for the use.
(drf_api) employee-management $ python manage.py migrate

(drf_api) employee-management $ python manage.py createsuperuser --email superhuman@blabla.com --username admin
Let’s add your app as API, open the api/settings.py file and add the rest_framework and employee apps to INSTALLED_APPS.
INSTALLED_APPS = [
     ...
     'rest_framework',

 'employees'

 ]


open the api/urls.py file and add urls for the 'employees' app;

...from django.contrib import admin
 from django.urls import path, include
 urlpatterns = [
     path('admin/', admin.site.urls),
     path('', include(employees.urls'))
 ]
This makes your basic setup ready and now you can start adding code to your employees’ service API.
TDD – Test Driver Development
Before we write the business logic of our API, we will need to write a test. So this is what we are doing: Write a unit test for a view and then update the code to make so that your test case works
Let’s Write a test for the GET employees/ endpoint
Let’s create a test for the endpoint that returns all songs: GET employees/.
Open the employees/tests.py file and add the following lines of code;
Add this code to git and make gist link
For now, let’s attach screenshots:
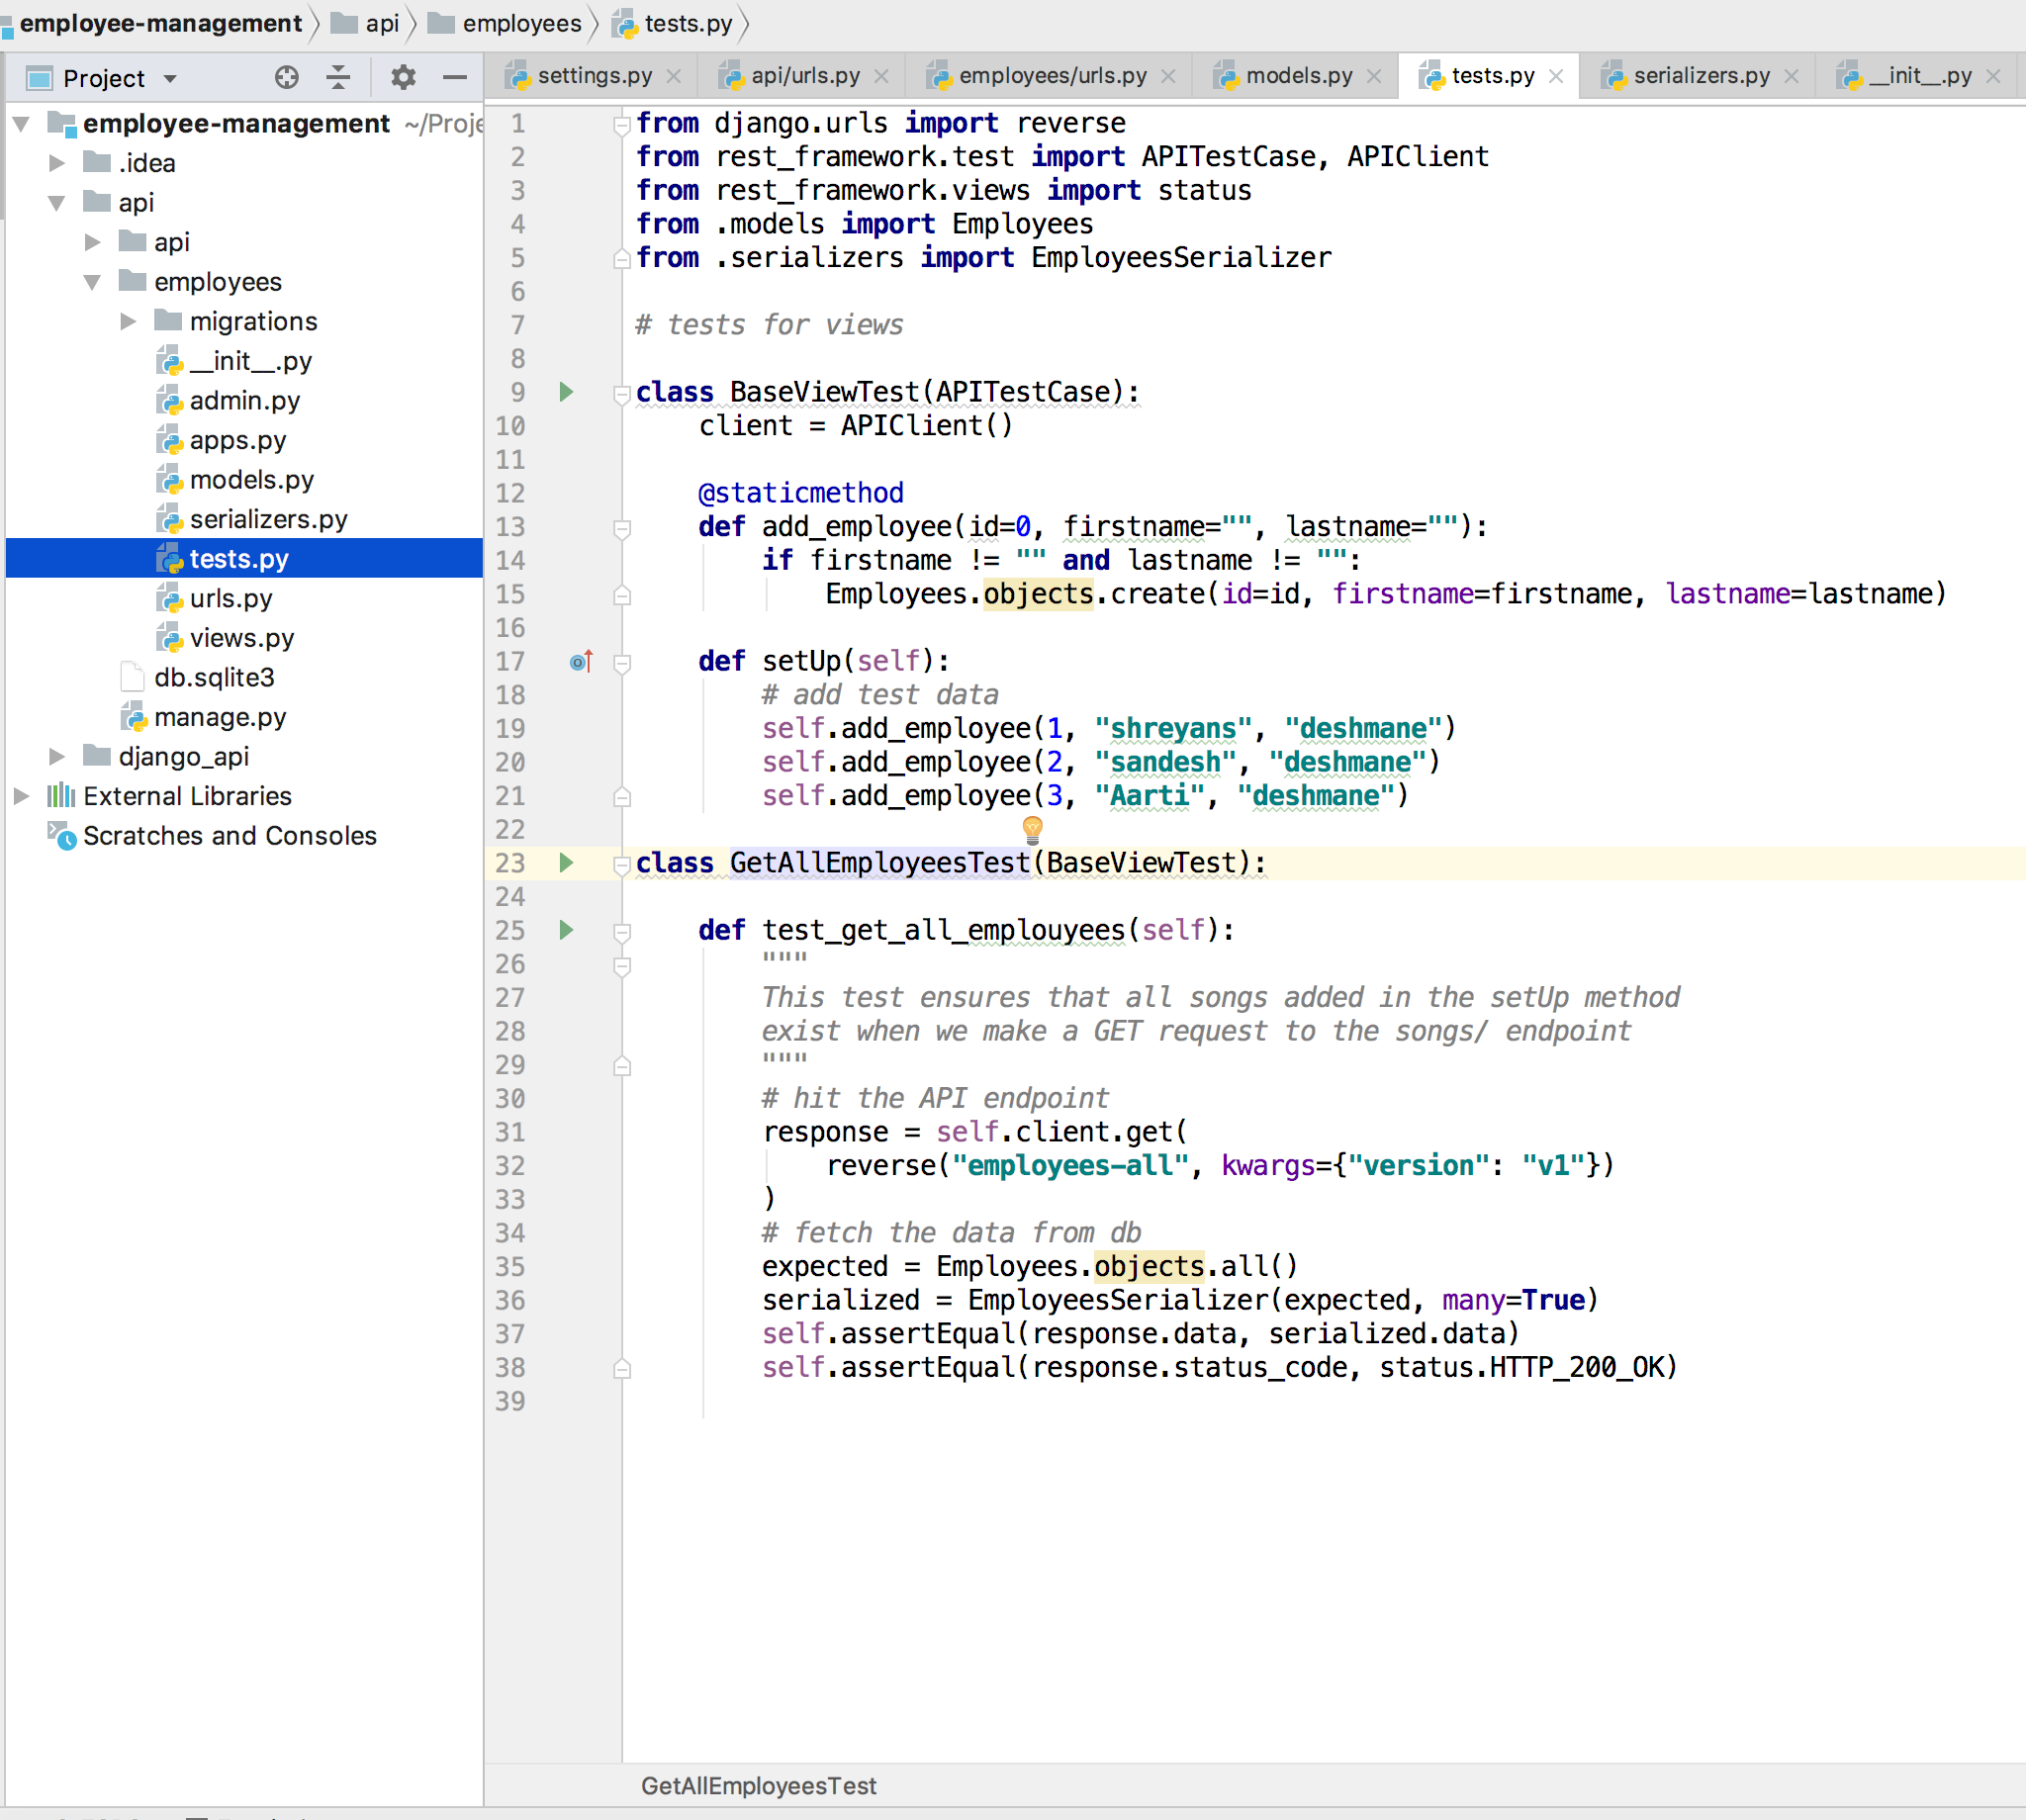
Do not try to run this code yet. We have not added the view or model code yet. Let’s add the view now.
You may also interested In: ChatGPT for software development
Add the View for GET employees/ endpoint
Now we will add the code the view that will respond to the request GET employees/.
Model: First, add a model that will store the data about the employees that will be returned in the response. Open the employees /models.py file and the following lines of code.
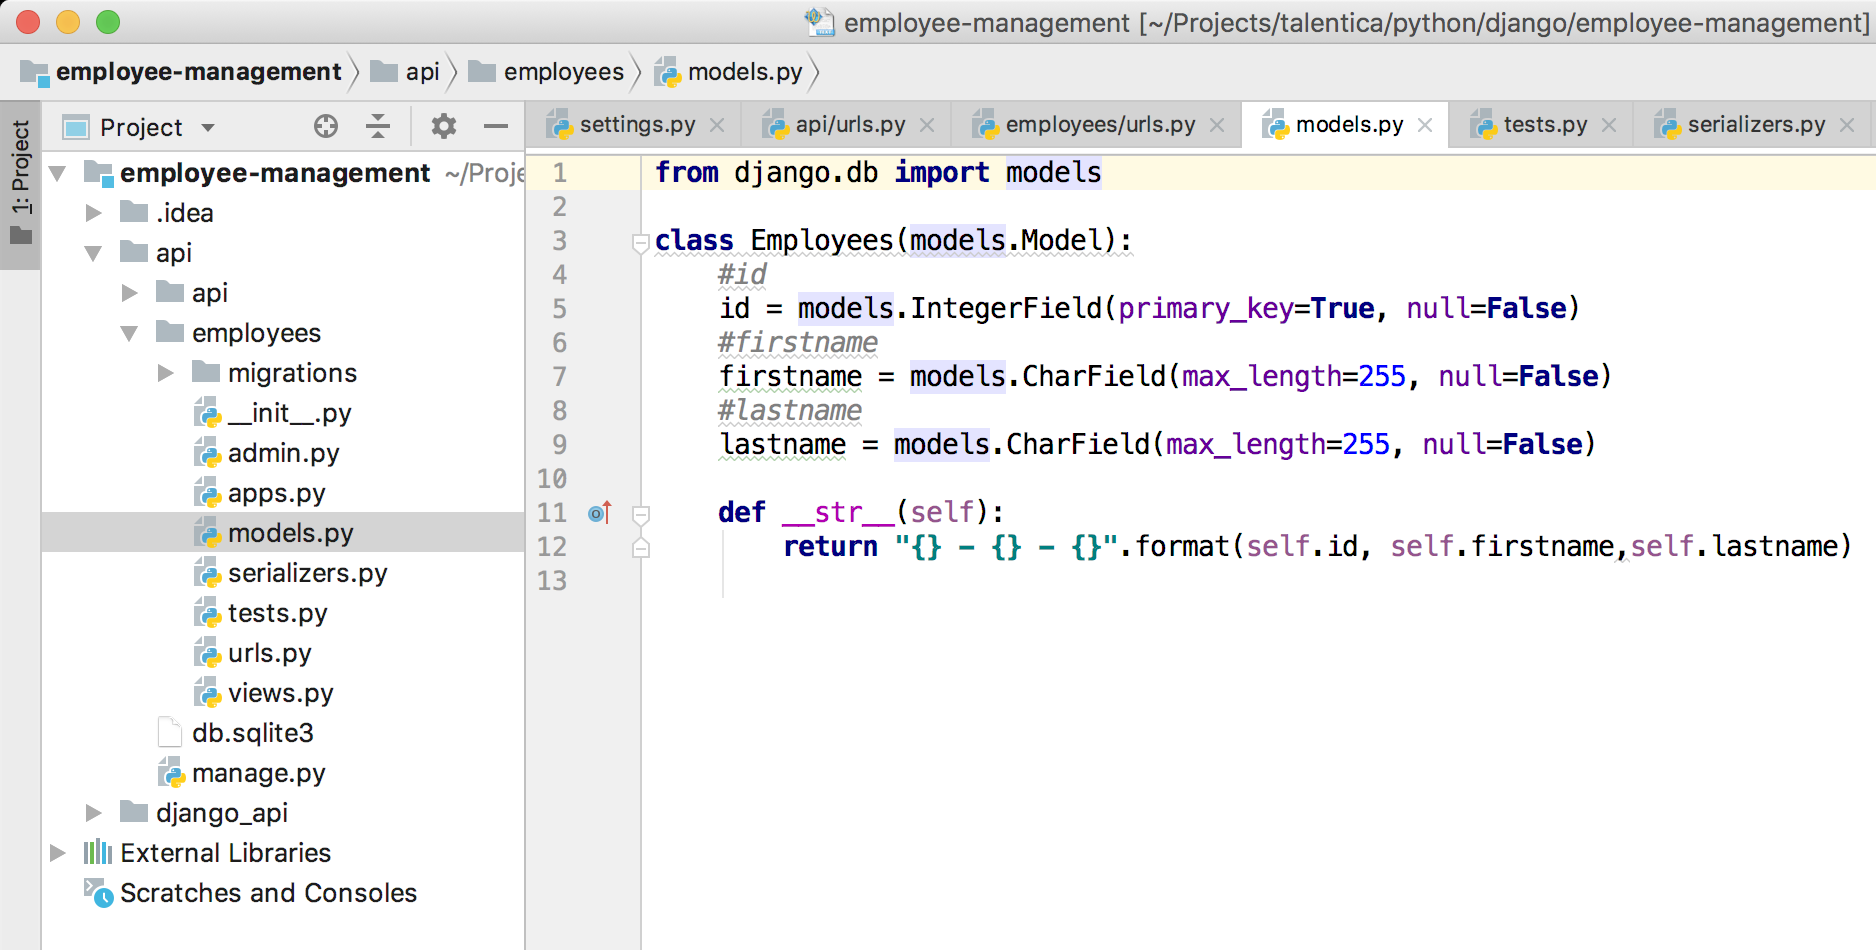
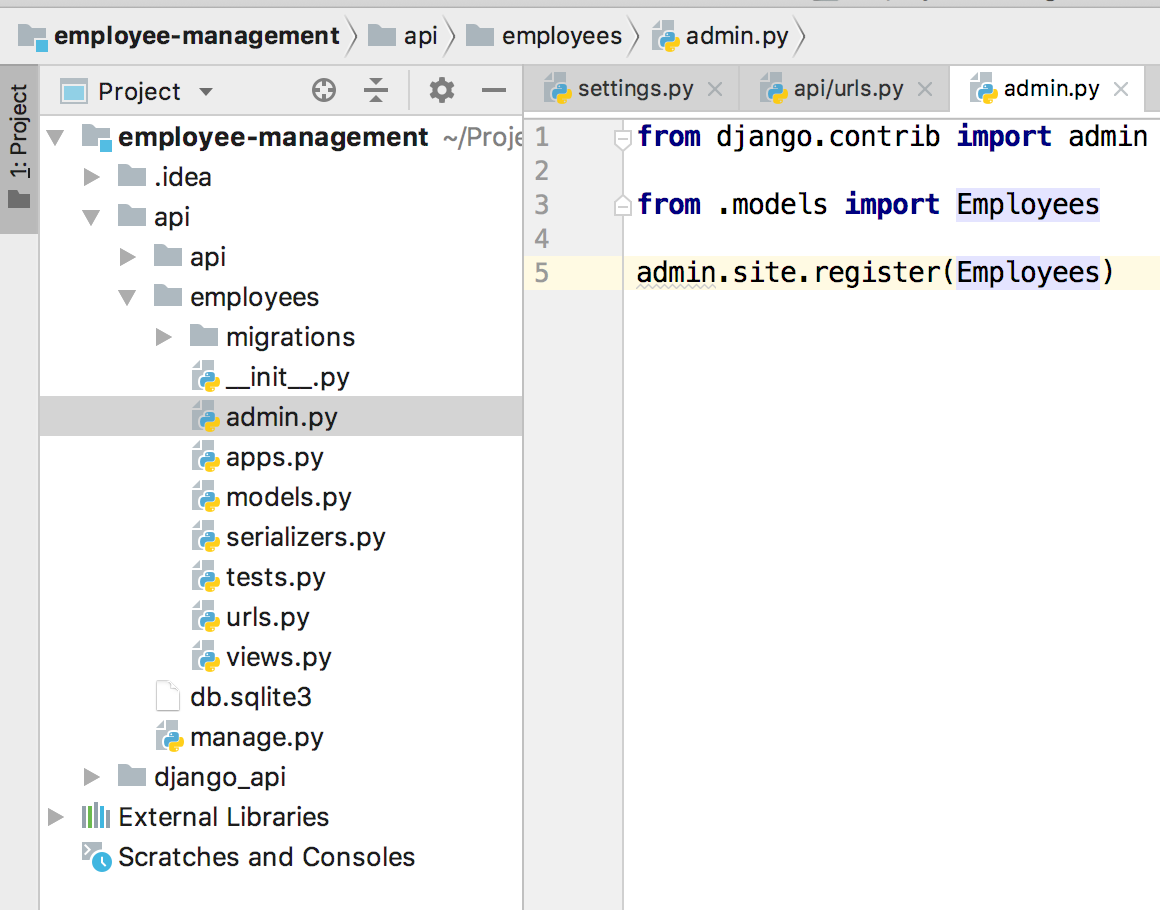
We will add our model to the admin. This will help in running the admin part of the employees. Like, add/remove employee via admin UI Lets add the following lines of code to the employees /admin.py file.
Now run make migrations from the command line
(drf_api) employee-management $ python manage.py makemigrations
Now run migrate command. This will create the employee’s table in your DB.
(drf_api) employee-management $ python manage.py migrate
Serializer: Add a serializer. Serializers allow complex data such as query sets and model instances to be converted to native Python datatypes that can then be easily rendered into JSON, XML or other content types.
Add a new file employees/serializers.py and add the following lines of code;
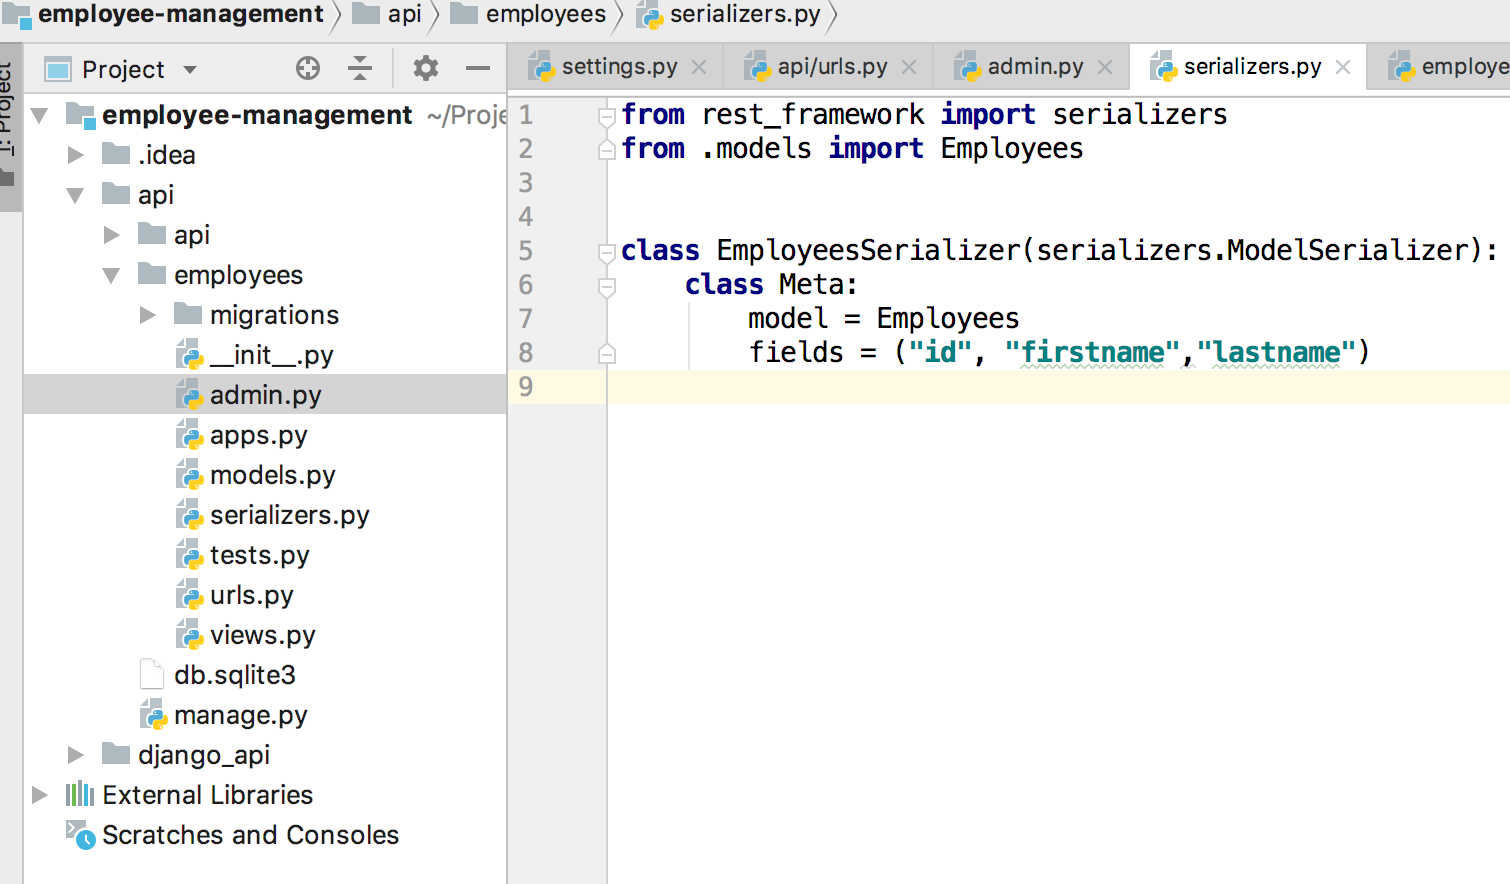
Serializers also provide deserialization, allowing parsed data to be converted back into complex types, after first validating the incoming data. The serializers in REST framework work very similarly to Django’s Form and ModelForm classes.
View: Finally, add a view that returns all songs. Open the employees/views.py file and the following lines of code;
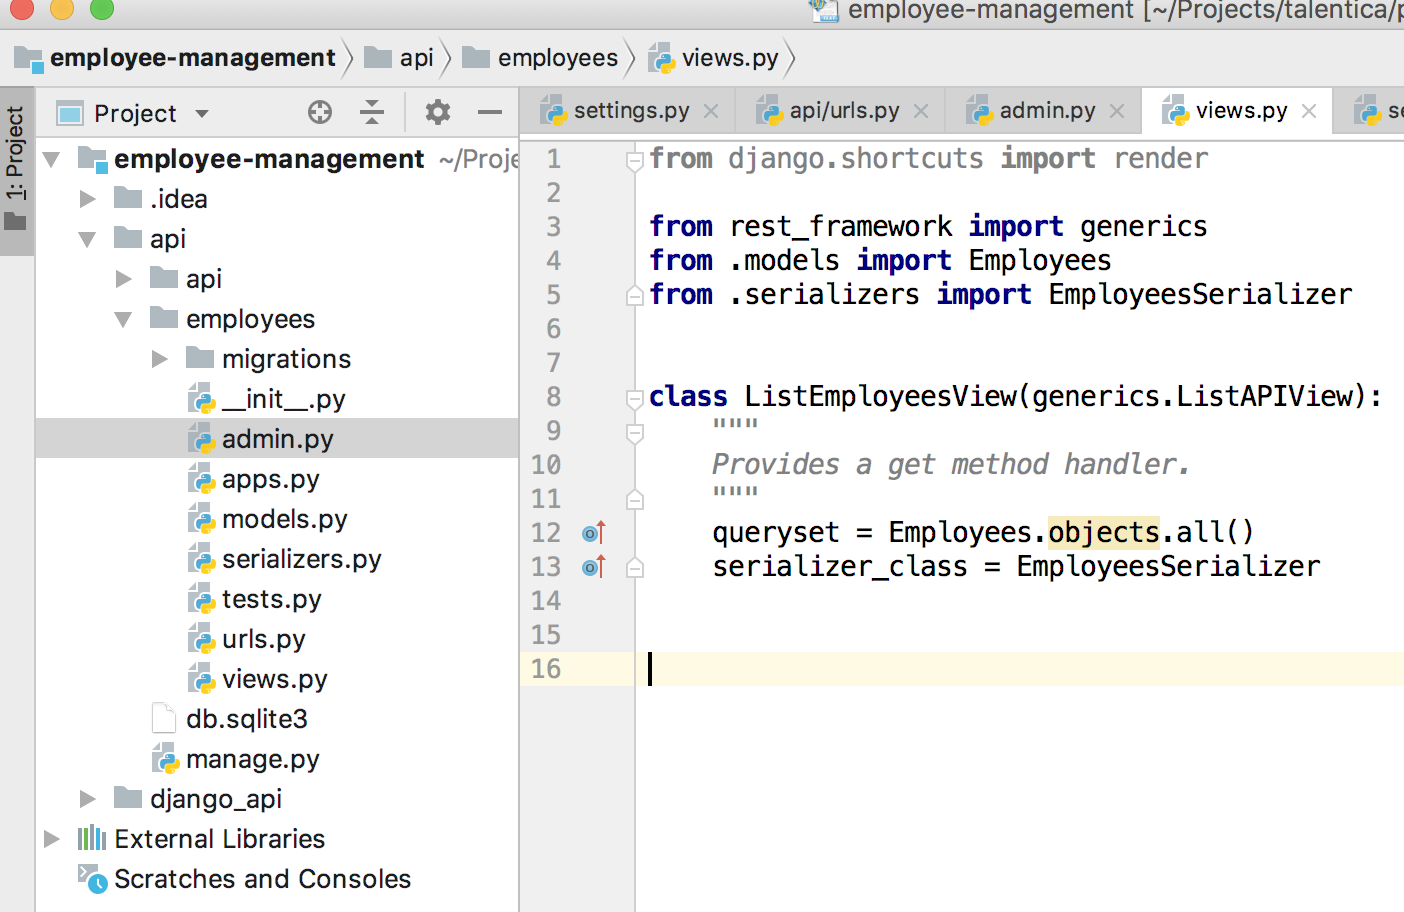
Here hew has specified how to get the objects from the database by setting the queryset attribute of the class and specify a serializer that will be used in serializing and deserializing the data.
The view in this code inherits from a generic viewset ListViewSet
Connect the views
Before you can run the tests, you will have to link the views by configuring the URLs.
Open the api/urls.py file and add the following lines of code;
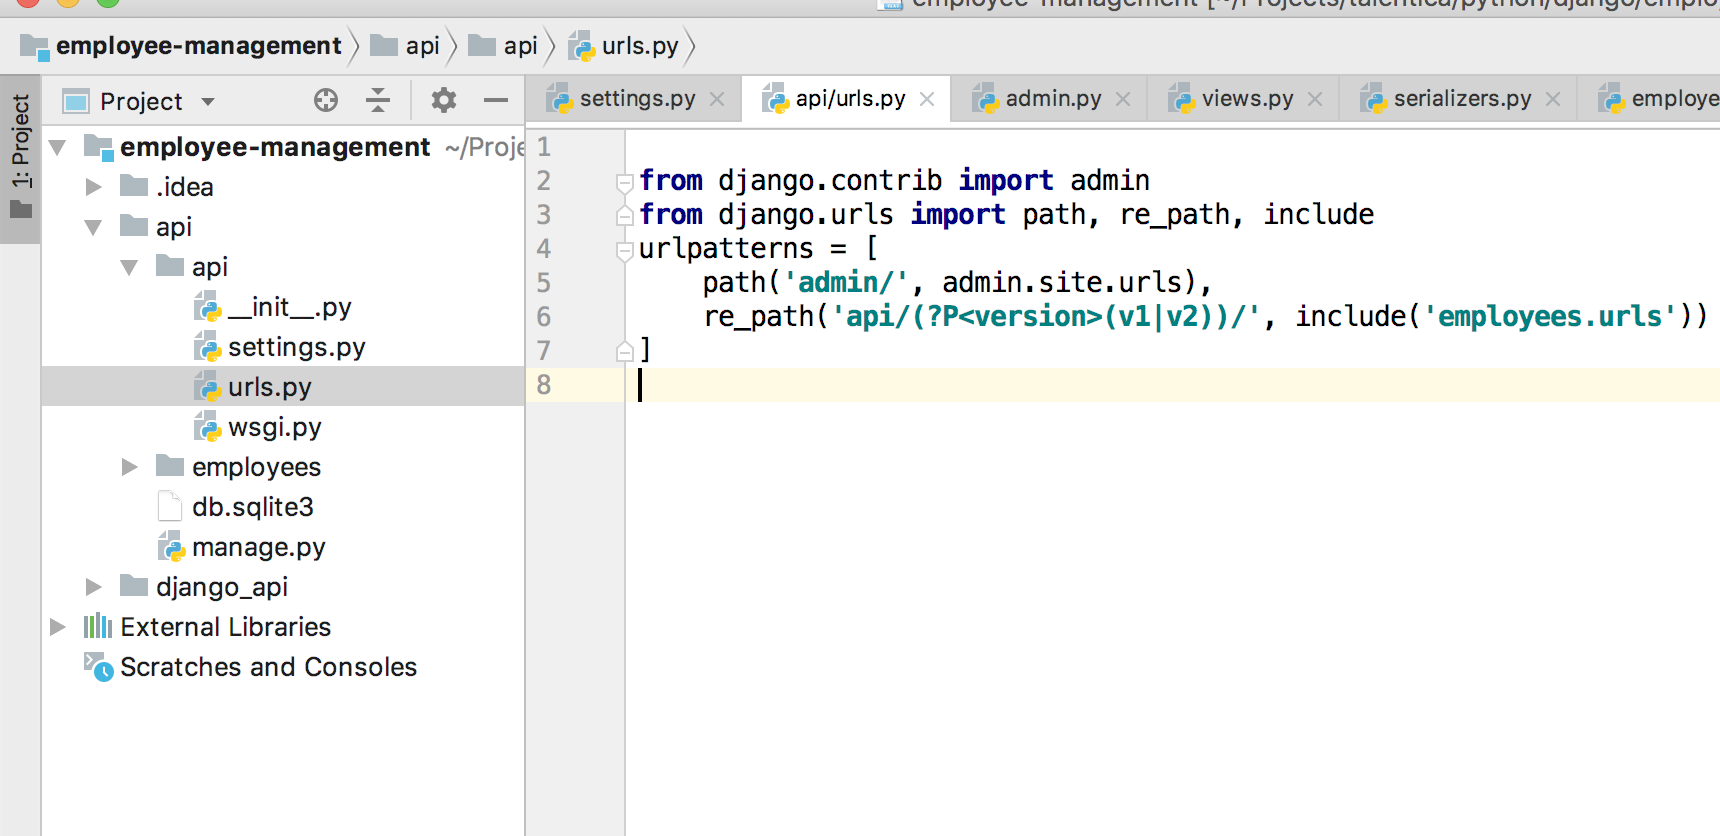
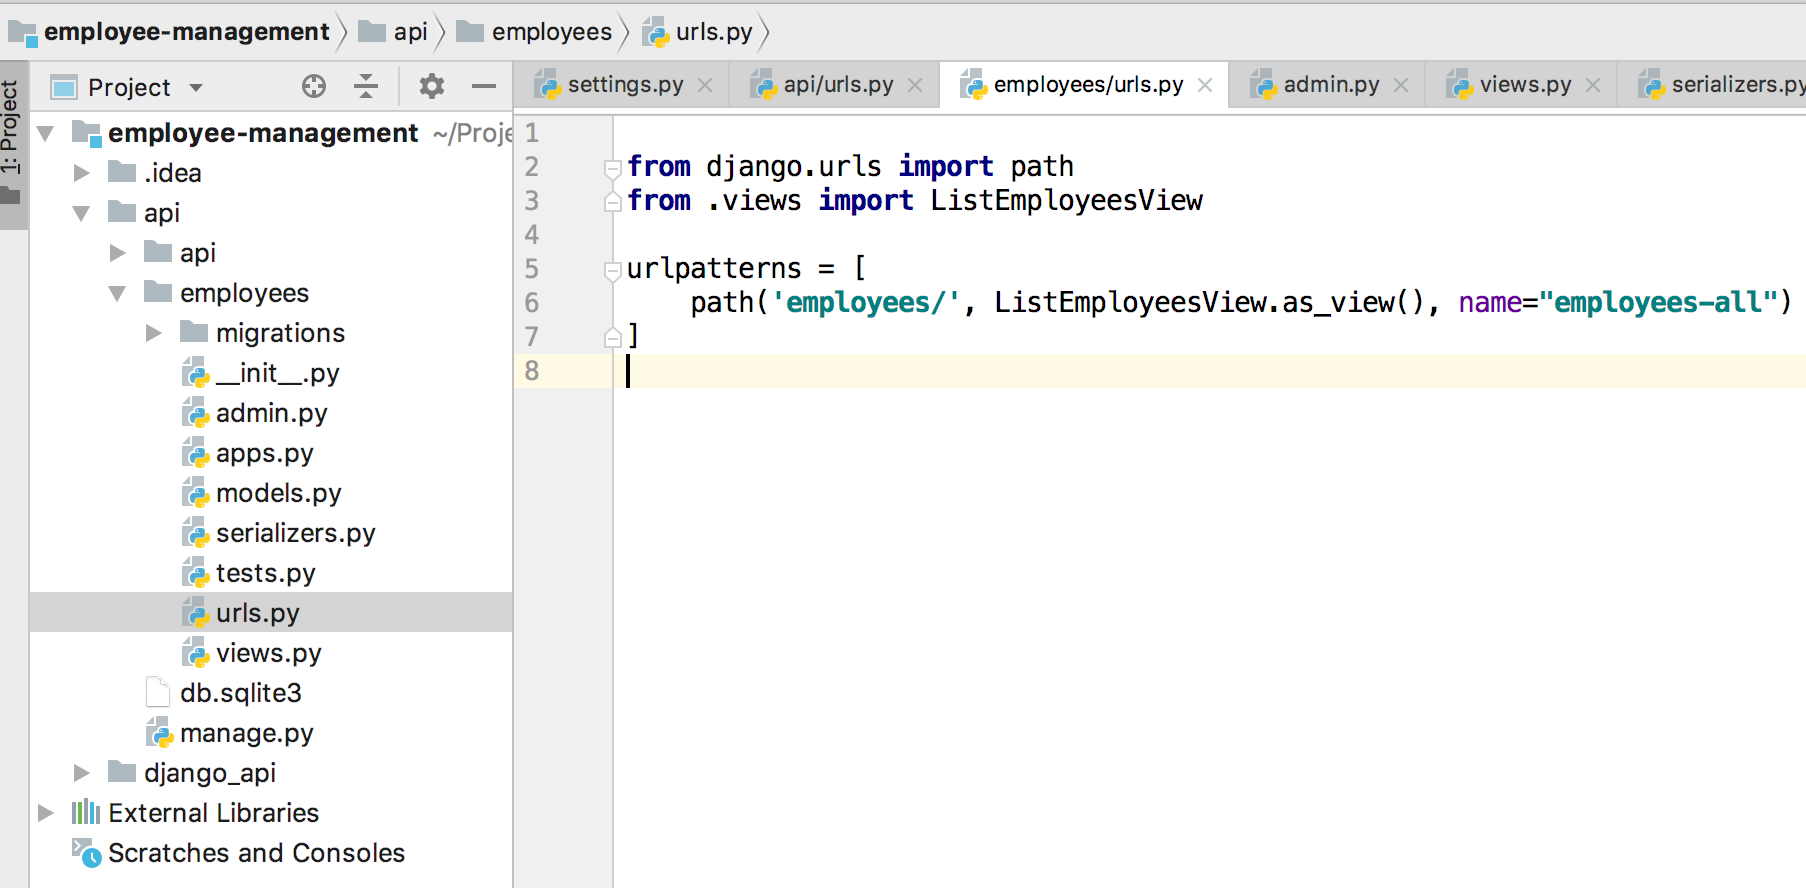
Now go to employees/urls.py and add below code;
Let’s run the test!
First, let’s run automated tests. Run the command;
(drf_api) employee-management $ python manage.py test
The output in your shell should be similar to this;

How to test this endpoint manually?
From your command line run below command
(drf_api) employee-management
nbsp; nohup python manage.py runserver & disown
Now type in http://127.0.0.1:8000/admin/ in your browser. You now will be prompted for username and password. Enter admin username and password which we have created while doing create user step.
The screen will look like below once you log in :
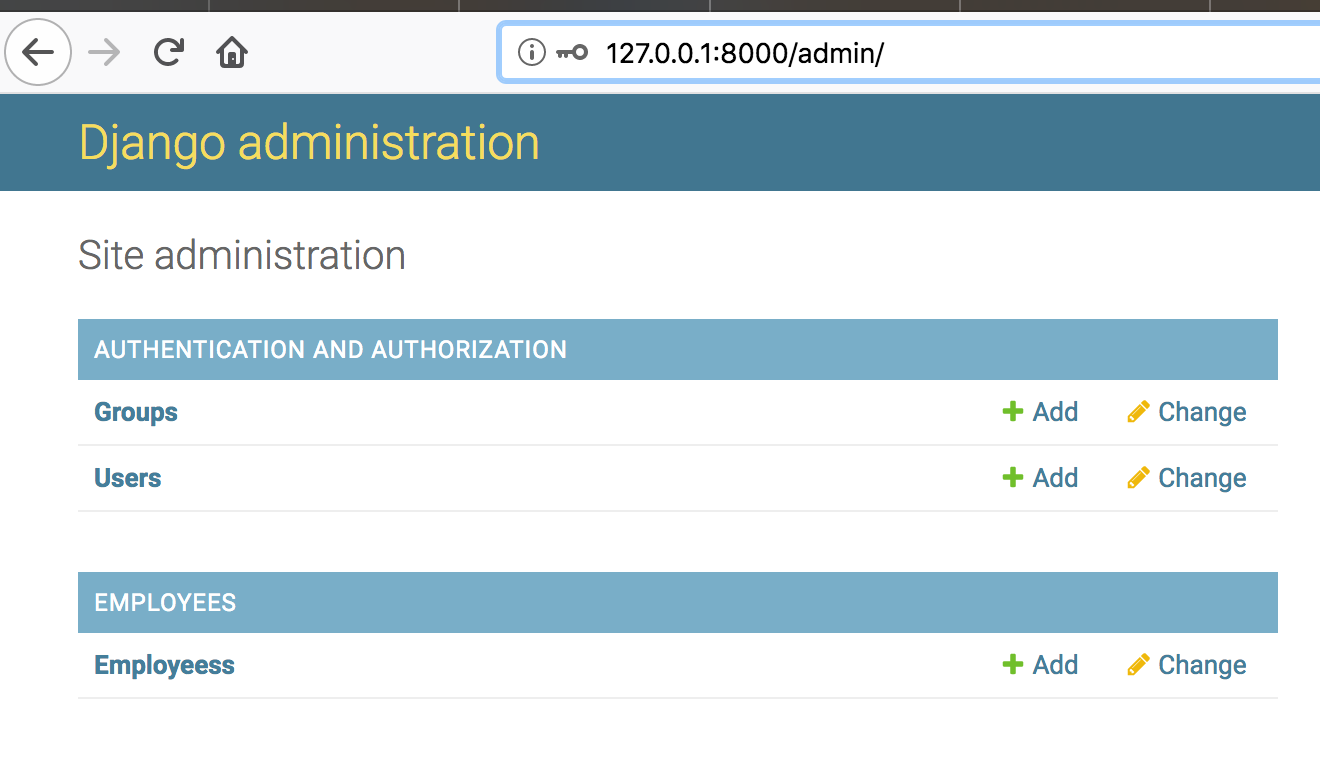
Let’s add a few employees by adding add button
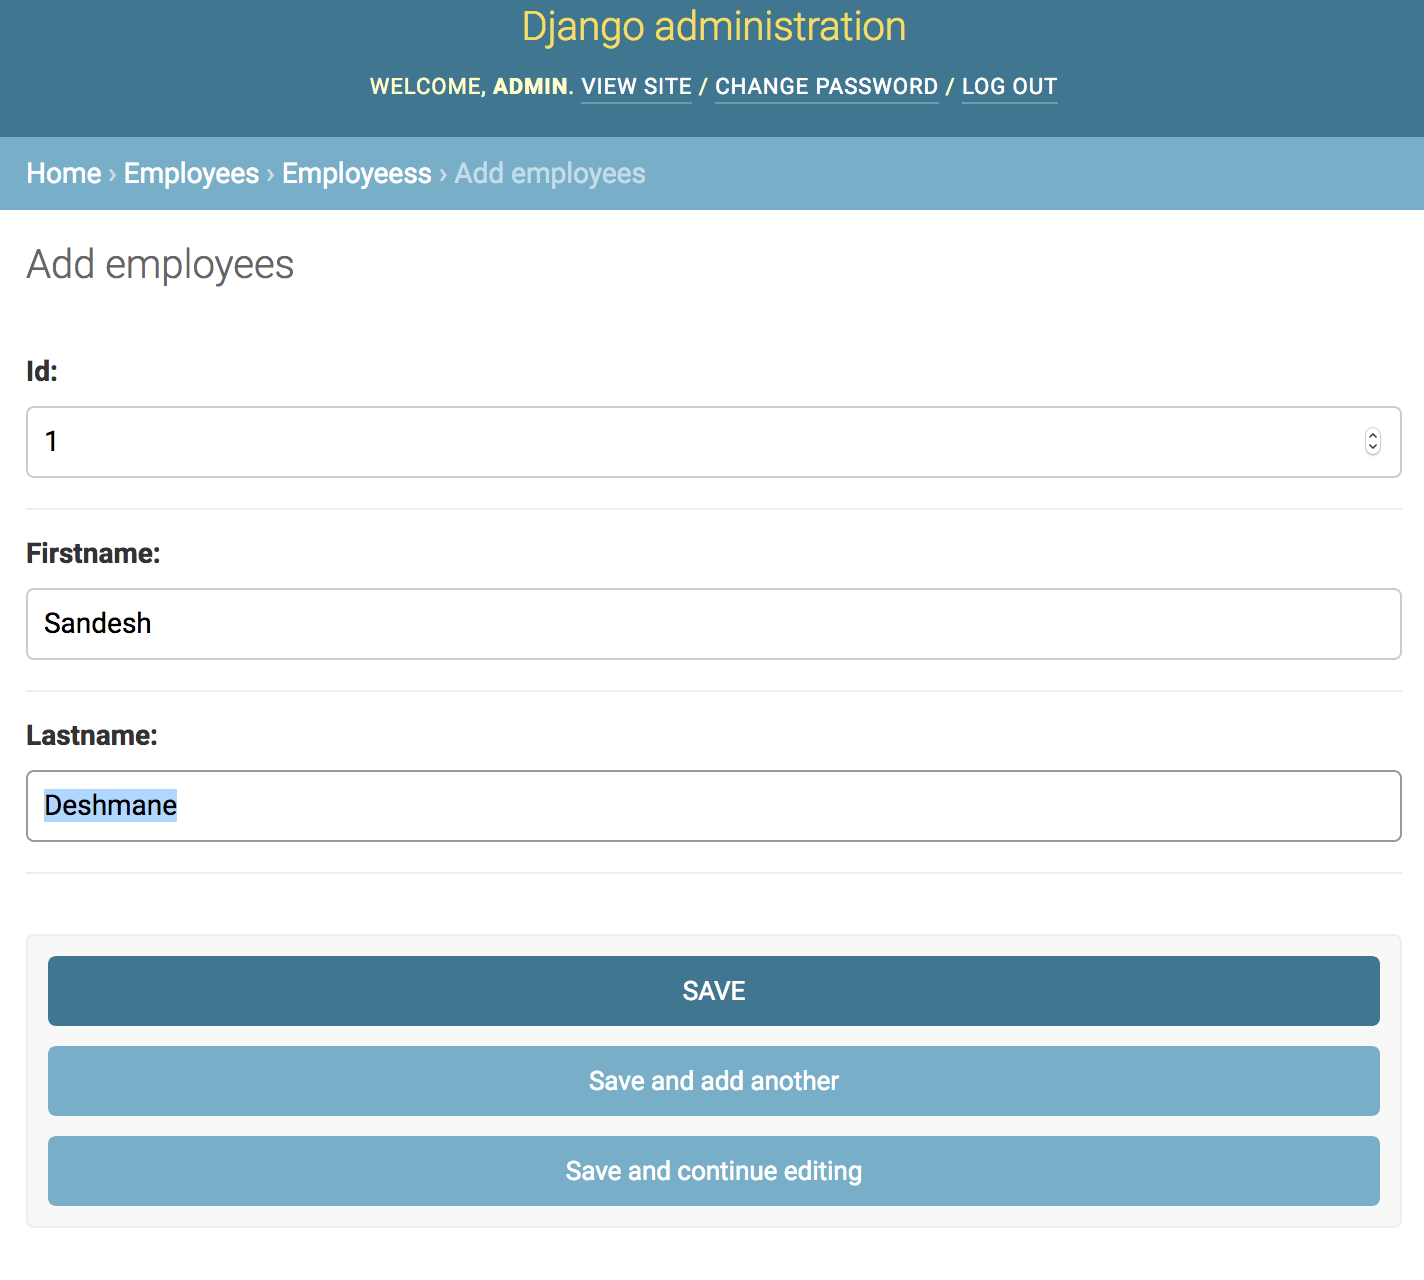
Once you added the employees. Let’s test our view employees API by hitting URL below
http://127.0.0.1:8000/api/v1/employees/
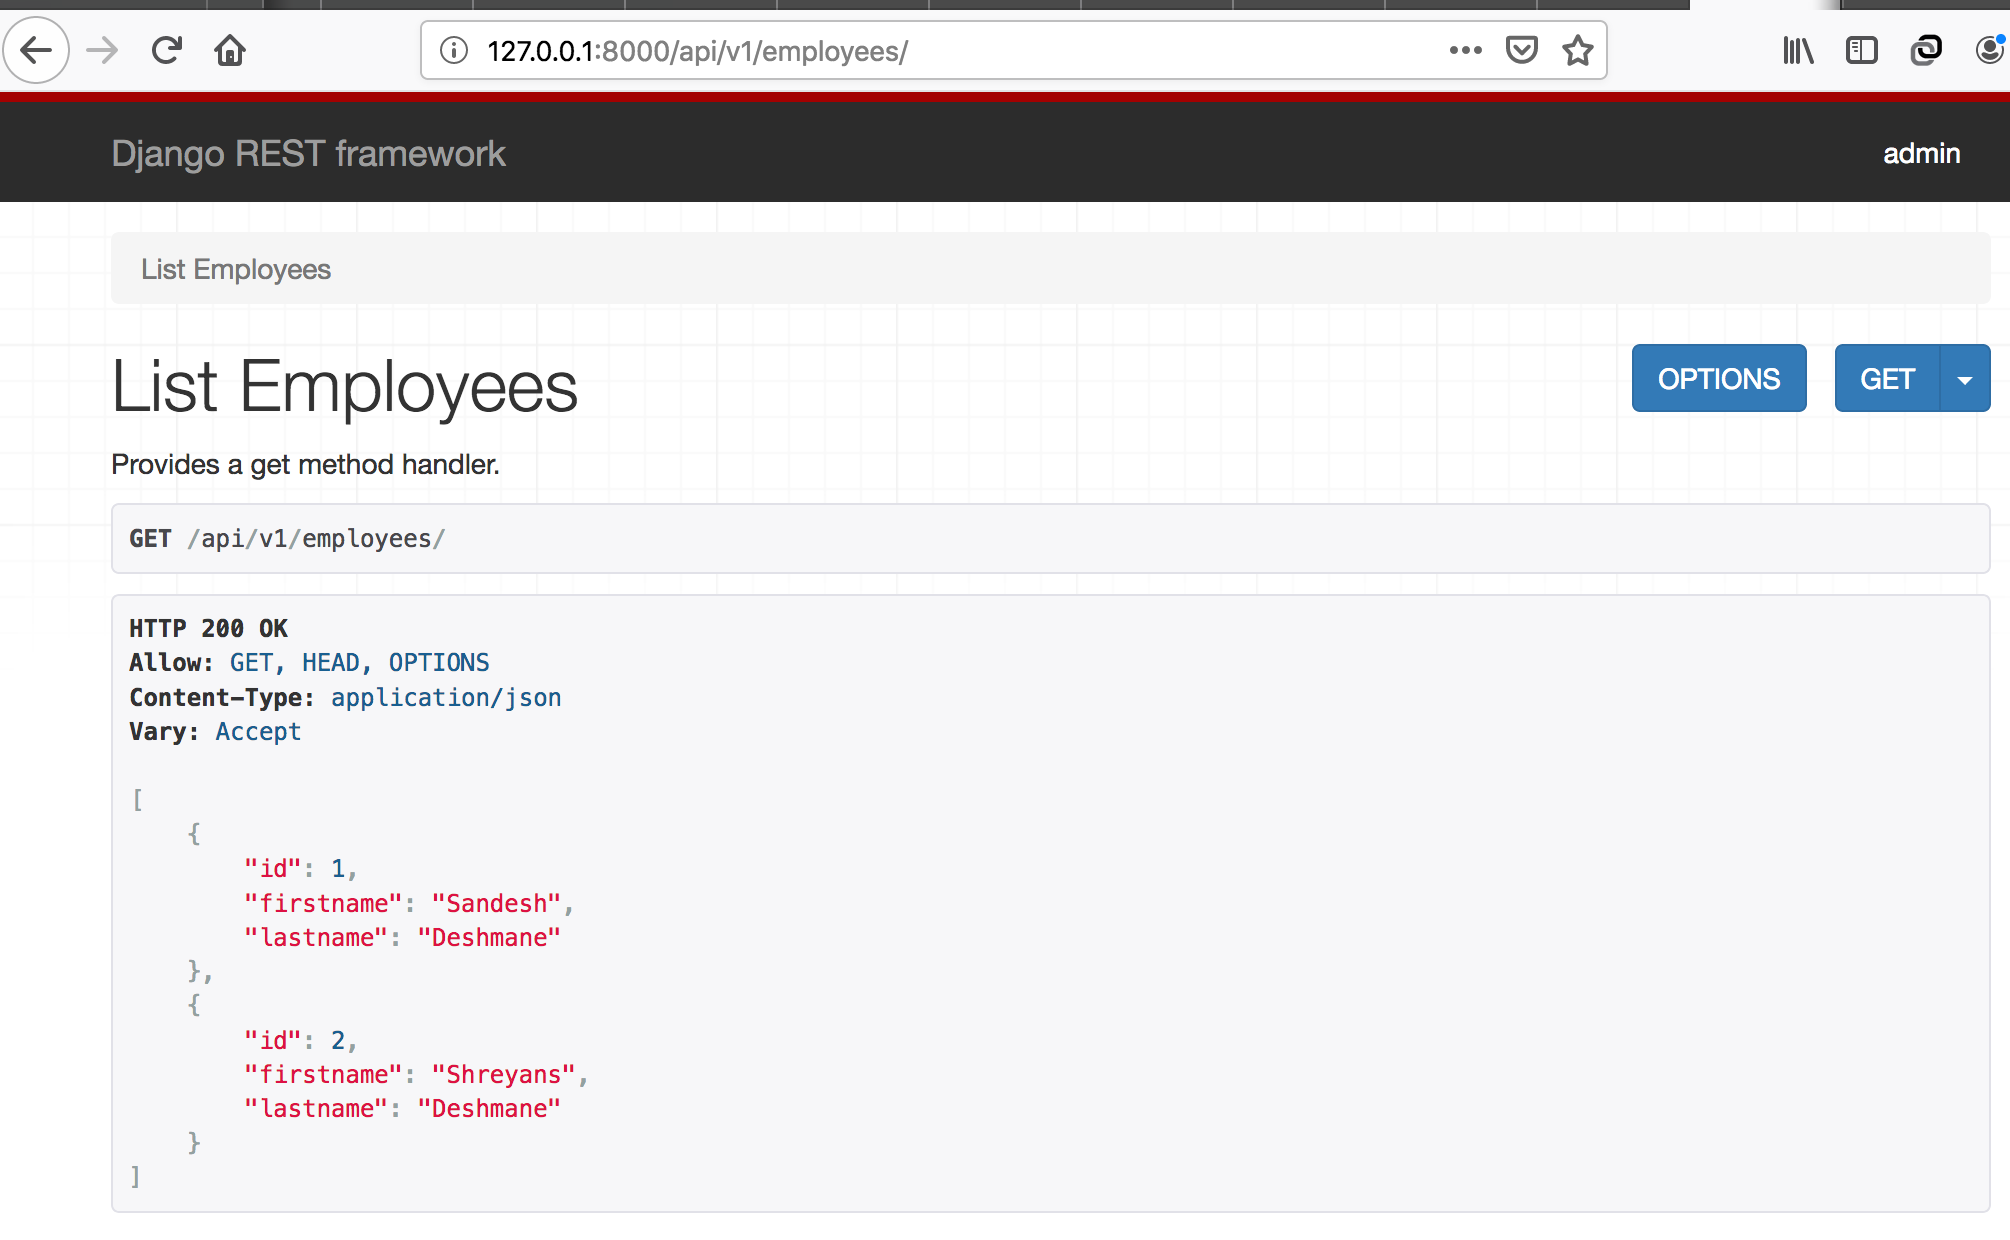
If you are able to see the above screen. This means your API works.
Congrats! Your first API using DRF is live.


