


TestFlight
Most mobile application developers try to automate build sharing process as it is one of the most tedious tasks in an app development cycle. However, it always remained difficult especially for iOS developers because of Apple’s code signing requirements. So when iOS developers start thinking about automating build sharing, the first option which comes to their mind is TestFlight.
Before TestFlight acquisition by Apple, it was easy to automate build sharing process. TestFlight had it’s own public API’s (http://testflightapp.com/api) to upload and share builds from the command line. Developers used these API’s to write automation scripts. After Apple’s acquisition, TestFlight made part of app store connect and invalidated old API’s. Therefore to upload or share build developers had to rely on third-party tools like Fastlane.
App Store Connect API
In WWDC 2018, Apple announced new App Store Connect API and made it publicly available in November 2018. By using App Store Connect API, developers can now automate below TestFlight workflow without relying on any third party tool. The workflow includes:
- Managing beta groups
- Adding or removing beta testers
- Submitting uploaded build for review
- Sending notification of an available build
In this short post, we will see a use case example of App Store Connect API for TestFlight.
Authentication
App Store Connect API is a REST API to access data from the Apple server. Use of this API requires authorization via JSON Web Token. API request without this token results in error “NOT_AUTHORIZED”. Generating the JWT Token is a tedious task. We need to follow the below steps to use the App Store Connect API:
- Create an API Key in app store connectportal
- Generate JWT token using above API key
- Send JWT token with API call
Let’s now deep dive into each step.
Creating the API Key
The API key is the pair of the public and private key. You can download the private key from App Store Connect and public key will be stored on the Apple server. To create the private key, follow the below steps:
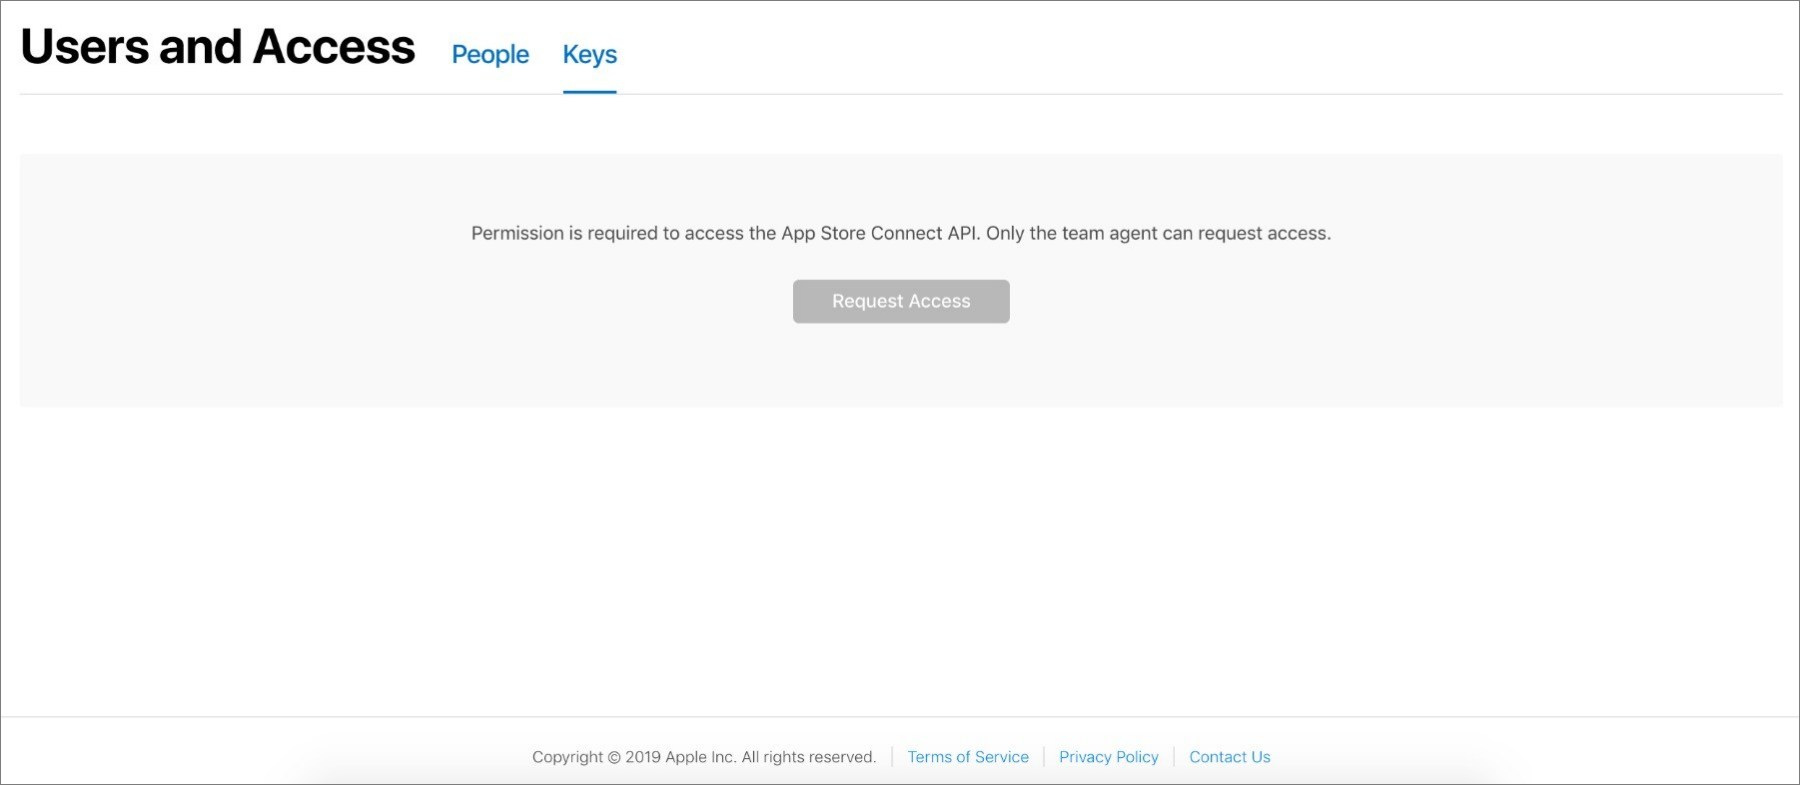
- Login to app store connect portal
- Go to ‘Users and Access’ section
- Then select ‘Keys’ section
Account holder (Legal role) needs to request for access to generate the API key.
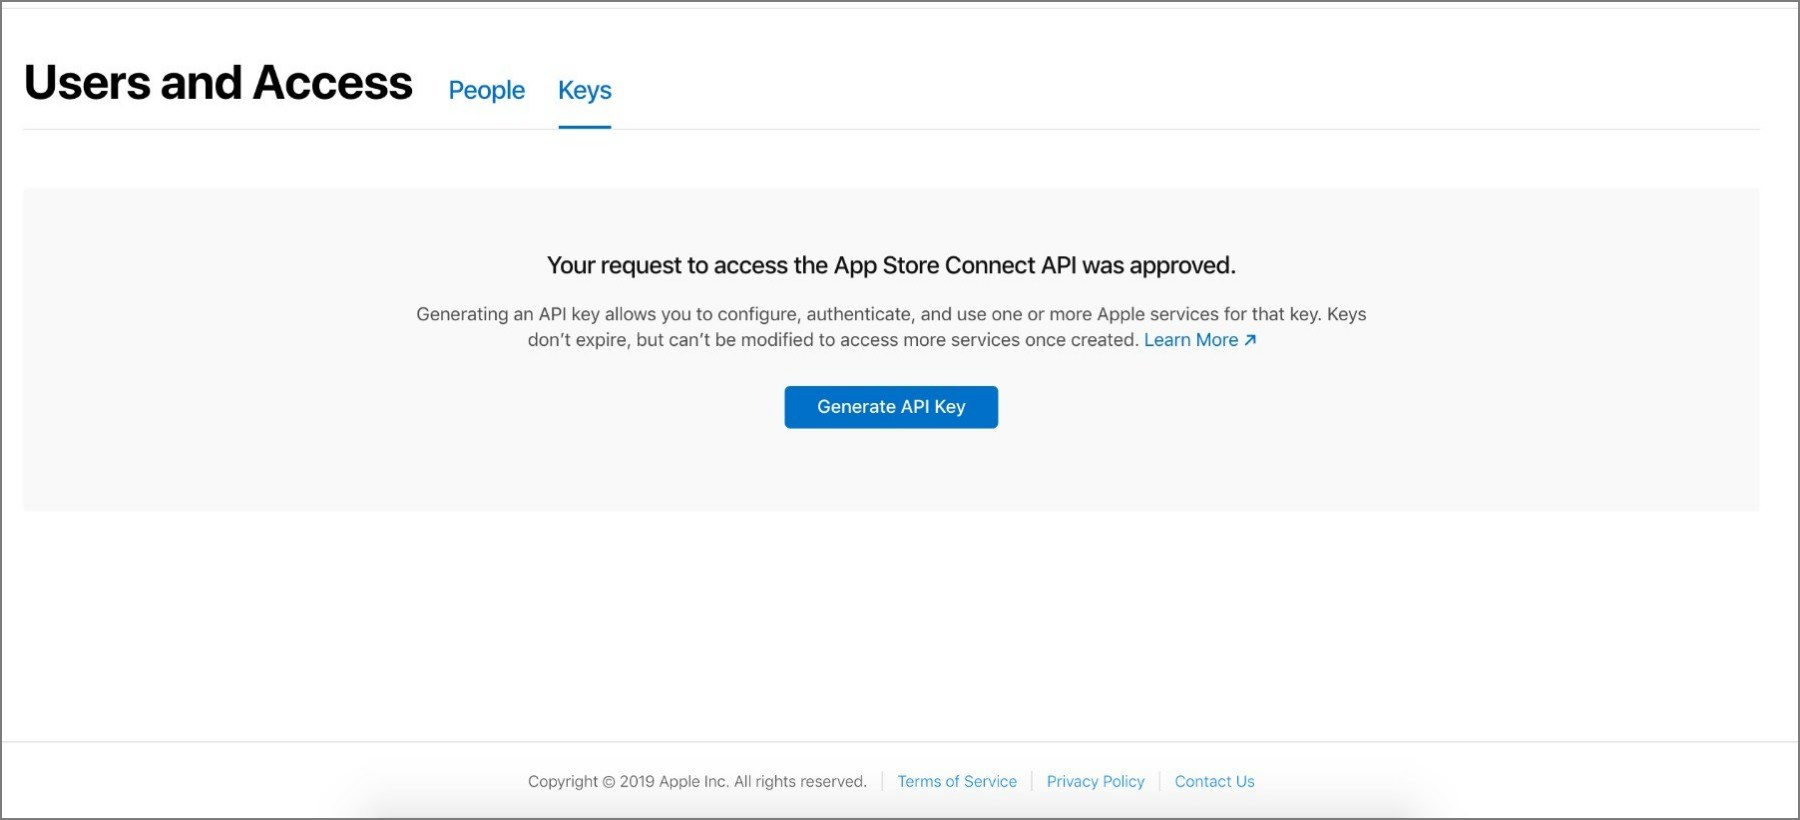
Once you get access, you can generate an API key.
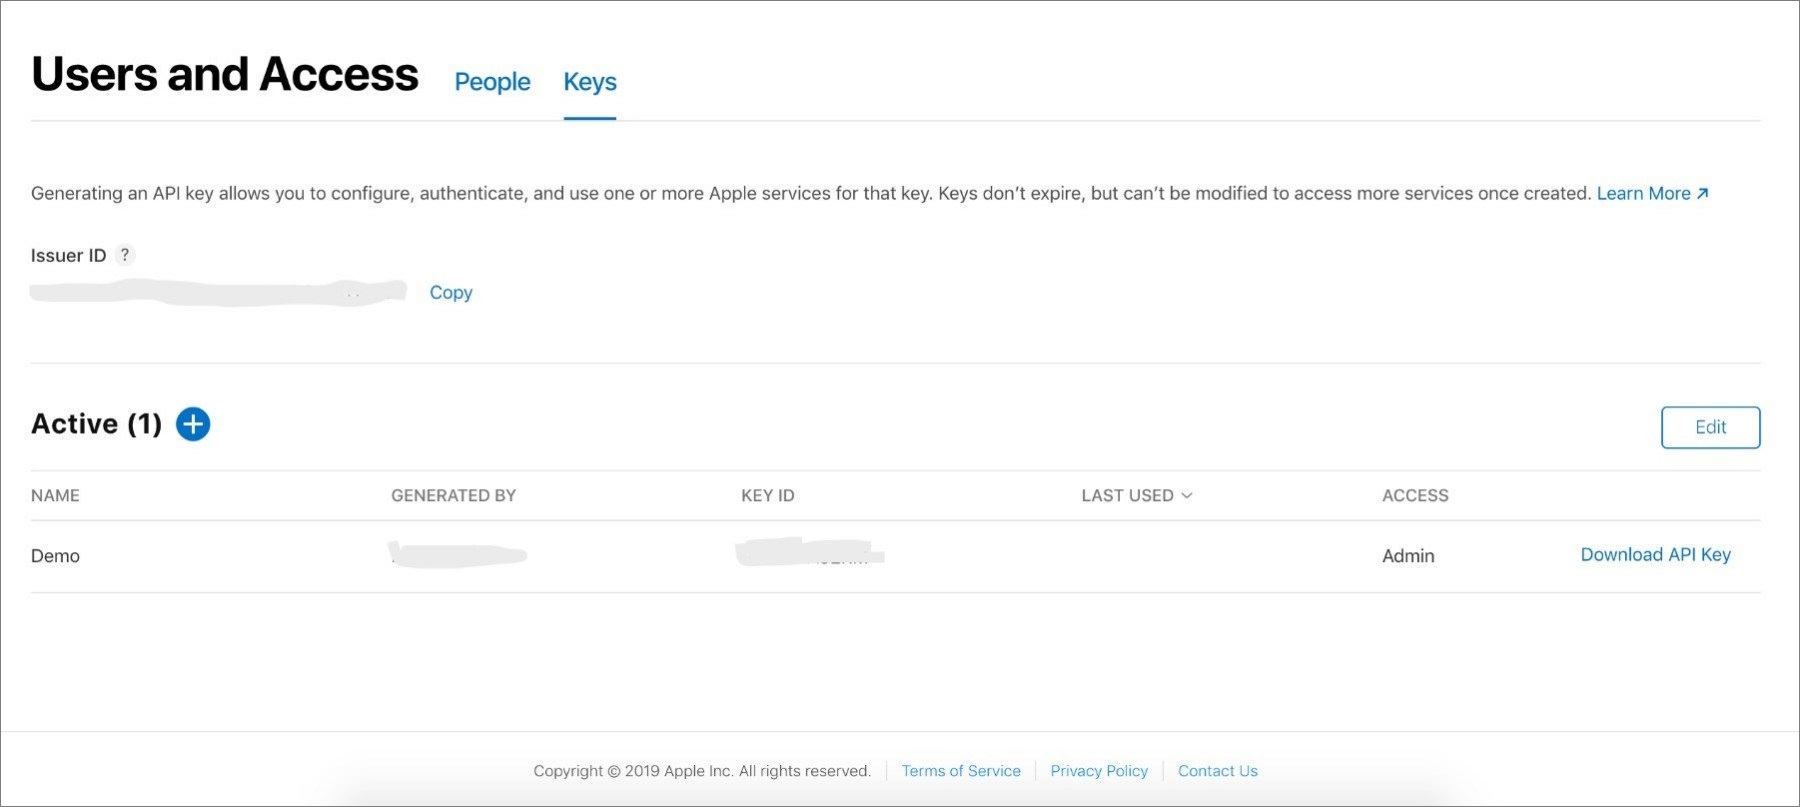
There are different access levels for keys like Admin, App Manager, developer etc. Key with the ‘Admin’ access can be used for all App Store Connect API.
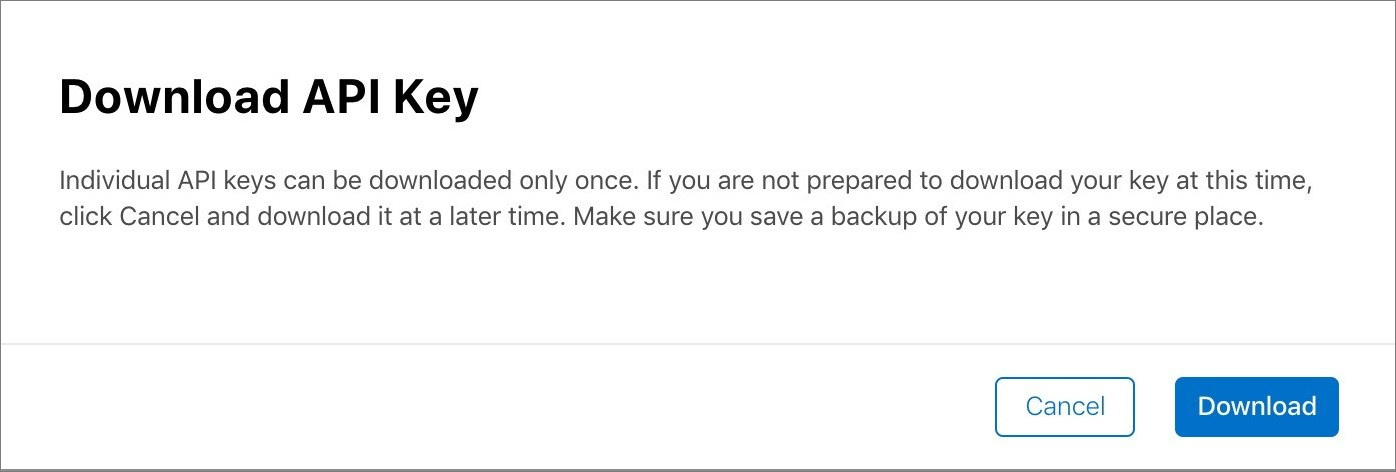
Once you generate the API key, you can download it. This key is available to download for a single time only, so make sure to keep it secure once downloaded.
The API key never expires, you can use it as long as it’s valid. In case you lose it, or it is comprised then remember to revoke it immediately. Because anyone who has this key can access your app store record.
Generate JWT Token
Now we have the private key required to generate the JWT token. To generate the token, we also need the below-mentioned parameters:
- Private key Id: You can find it on the Keys tab (KEY ID).
- Issuer Id: Once you generate the private key, you will get an Issuer_ID. It is also available on the top of the Keys tab.
- Token Expiry: The generated token can be used within a maximum of 20 minutes. It expires after lapse of the specified time.
- Audience: As of now it is “appstoreconnect-v1”
- Algorithm: The ES256 JWT algorithm is used to generate a token.

Once all the parameters are in place, we can generate the JWT token. To generate it, there is a Ruby script which is used in the WWDC demo.
require "base64"
require "jwt"
ISSUER_ID = "ISSUER_ID"
KEY_ID = "PRIVATE_KEY_ID"
private_key = OpenSSL::PKey.read(File.read("path_to_private_key/AuthKey_#{KEY_ID}.p8"))
token = JWT.encode(
 {
    iss: ISSUER_ID,
    exp: Time.now.to_i + 20 * 60,
    aud: "appstoreconnect-v1"
 },
 private_key,
 "ES256",
 header_fields={
 kid: KEY_ID }
)
puts token
Let’s take a look at the steps to generate a token:
- Create a new file with the name jwt.rb and copy the above script in this file.
- Replace Issuer_Id, Key_Id and private key file path values in the script with your actual
- To run this script, you need to install jwt ruby gemon your machine. Use the following command to install it: $ sudo gem install jwt
- After installing the ruby gem, run the above script by using the command: $ ruby jwt.rb
You will get a token as an output of the above script. You can use this token along with the API call! Please note that the generated token remains valid for 20 minutes. If you want to continue using it after 20 minutes, then don’t forget to create another.
Send JWT token with API call
Now that we have a token, let’s see a few examples of App Store Connect API for TestFlight. There are many APIs available to automate TestFlight workflow. We will see an example of getting information about builds available on App Store Connect. We will also look at an example of submitting a build to review process. This will give you an idea of how to use the App Store Connect API.
Example 1: Get build information:
Below is the API for getting the build information. If you hit this API without the jwt token, it will respond with an error
$ curl https://api.appstoreconnect.apple.com/v1/builds
{
 "errors": [{
 "status": "401",
 "code": "NOT_AUTHORIZED",
 "title": "Authentication credentials are missing or invalid.",
 "detail": "Provide a properly configured and signed bearer token, and make sure that it has not expired. Learn more about Generating Tokens for API Requests https://developer.apple.com/go/?id=api-generating-tokens"
 }]
}
So you need to pass above-generated jwt token in the request
$ curl https://api.appstoreconnect.apple.com/v1/builds --Header "Authorization: Bearer your_jwt_token”
{
"data": [], // Array of builds available in your app store connect account
"links": {
"self": "https://api.appstoreconnect.apple.com/v1/builds"
},
"meta": {
"paging": {
"total": 2,
"limit": 50
}
}
}
Example 2: Submit build for review process:
By using the above build API, you can get an ID for the build. Use this ID to submit a build for the review process. You can send the build information in a request body like:
{
 "data": {
 "type": "betaAppReviewSubmissions",
 "relationships": {
 "build": {
 "data": {
 "type": "builds",
 "id": “your_build_Id"
 }
 }
 }
 }
}
In the the above request body, you just need to replace your build ID. So the final request will look like:
$ curl -X POST -H “Content-Type: application/json” –data ‘{“data”:{“type”:”betaAppReviewSubmissions”,”relationships”:{“build”:{“data”:{“type”:”builds”,”id”:”your_build_Id”}}}}}’https://api.appstoreconnect.apple.com/v1/betaAppReviewSubmissions –Header “Authorization: Bearer your_jwt_token”
That’s it. The above API call will submit the build for the review process. This way you can use any other App Store Connect API like getting a list of beta testers or to manage beta groups.
Conclusion
We have seen the end-to-end flow for App store Connect API. By using these API you can automate TestFlight workflow. You can also develop tools to automate the release process without relying on any third-party tool. You can find the documentation for App Store Connect API here. I hope you’ll find this post useful. Good luck and have fun.